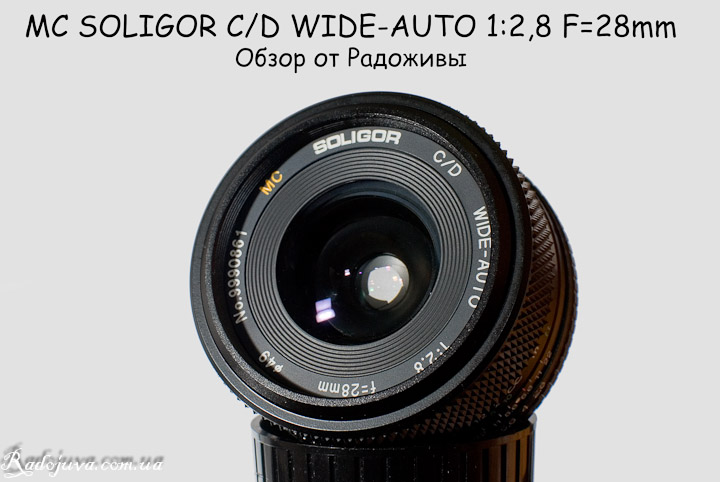
Thanks to Alexander from the manual optics section for the opportunity to review the MC Soligor Wide-Auto 1:2.8 F=28mm .
Review Soligor 28mm F2.8
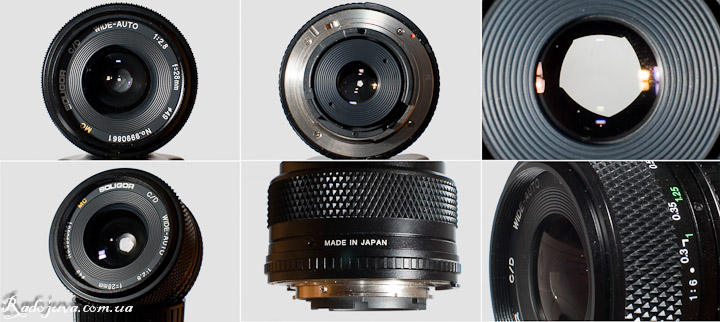
The MC Soligor Wide-Auto 1: 2.8 F = 28mm lens is made in Japan, as evidenced by the inscription on the body. According to unverified data, such Soligors were made by Tokina.
View MC Soligor Wide-Auto 1: 2.8 F = 28mm from different sides
TTX MC Soligor Wide-Auto 1: 2.8 F = 28mm Focal length: 28mm fixed (fixed lens) The weight: about 200g, exactly unknown Diameter of the front screw-in filter: 49mm Number of aperture blades: 6 pieces, not rounded Diaphragm: F2.8-F2 with fixed values F2.8, F4, F5.6, F8, F11, F16, F22 Optical design: unknown MDF: 0.3m, focusing is only manual. Mounting: Nikon F mount (ai-s type), designed for FX and DX cameras
The MC Soligor Wide-Auto 1:2.8 F=28mm was produced for virtually every popular film camera system. My copy bears serial number 9990861; the lens is in perfect condition and is designed for a Nikon bayonet mount (bayonet version).
View of the MC Soligor Wide-Auto 1: 2.8 F = 28mm on a modern central control valve
This review presents the MC Soligor 2.8/28mm lens for the Nikon system with the native Nikon F-mount, AI-S type. This means that aperture control is available in semi-automatic mode, and the camera "understands" the aperture setting. This lens is no different from modern lenses, except for the lack of autofocus and aperture control via the aperture ring, not the camera itself. Exposure metering will only work on the top-end Nikon DZK series: D1, D2, D3, D4, D200, D300, D700, D800, and D7000. On lower-end cameras, the lens is only available in manual M mode. A green dot in the corner of the viewfinder indicates accurate focus. Focusing is seamless when used with Live View.
If there is a need for automation on junior cameras, then Lushnikov's Dandelion for Nikon can help a lot in this - exposure metering and a pseudo-auto-focus mode will appear.
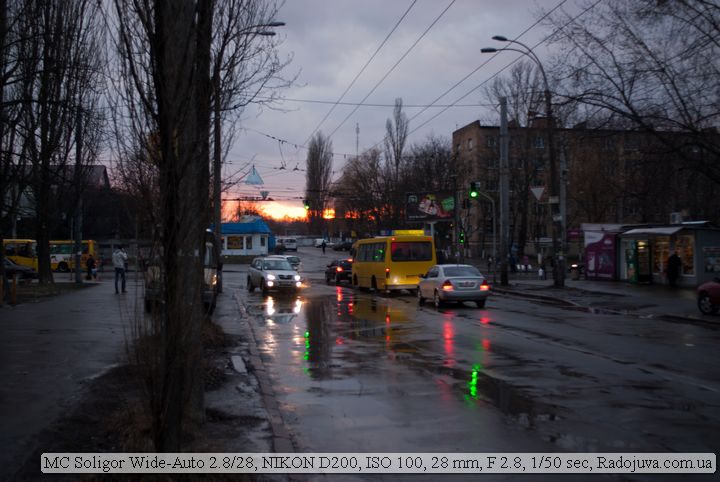
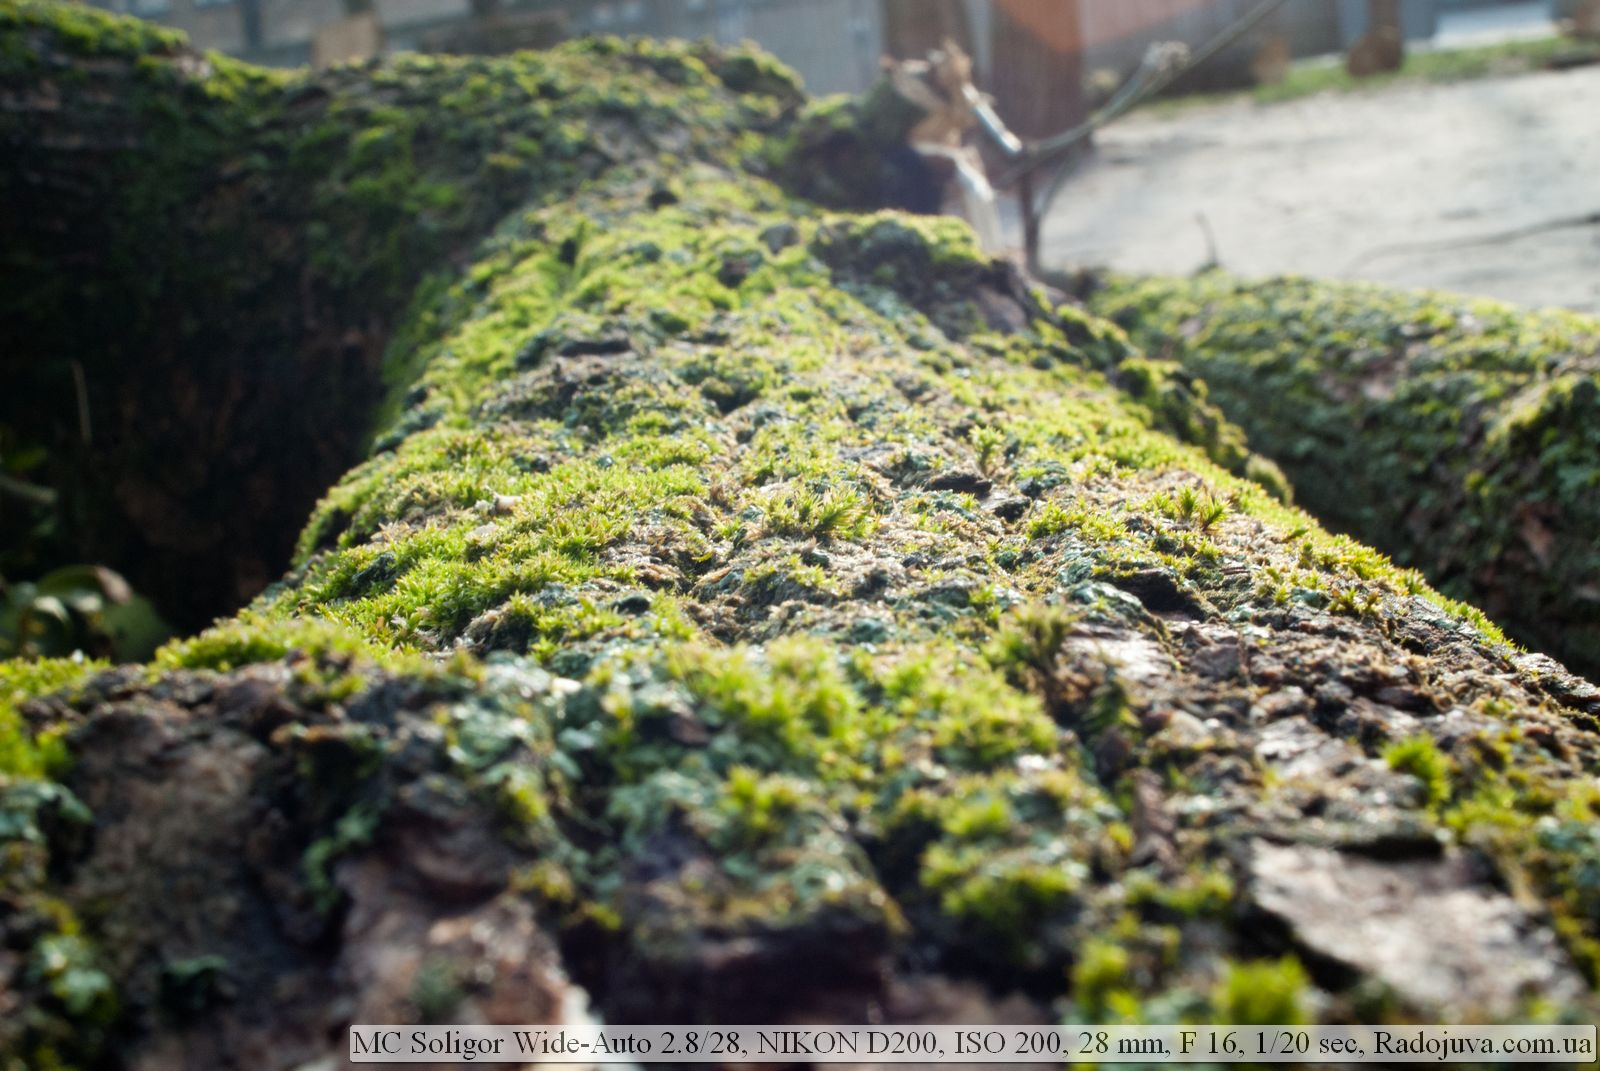
Sample photo on the Soligor F2.8 28mm
Briefly about MC Soligor 2.8/28 :
1. The MC Soligor Wide-Auto 1:2.8 F=28mm is a wide-angle manual focus lens. Focusing is manual only. The minimum focusing distance is just 30 cm, and the lens states that the maximum image magnification at MFD is 1:6. The focusing ring rotates only 45 degrees, which is not a problem for a wide-angle lens. Focusing is pleasant and easy. About half the lens is devoted to the focusing ring. Focusing distances are indicated in meters and feet, with infinity occurring after 2 meters. When focusing, the lens extends forward by half a centimeter; the front lens group does not rotate, allowing the use of various filters. All lenses in the helicoid move during focusing. MC Soligor Wide-Auto 1:2.8 F=28mm – has nothing unusual in the focusing method, everything happens like most other old manual fixed lenses.
Aperture does not fail. Photo on Soligo 2.8 / 28
2. The maximum aperture of F2.8 makes this lens a fast lens. It's very difficult to make a good wide-angle lens, which is why, for example, brand-new 28mm F1.4 wide-angle lenses cost a fortune. With such a fast aperture, you can easily handhold in low light . The aperture has only six blades, and even those aren't rounded. This can result in "bulges" in the out-of-focus areas. Bokeh is not usually discussed with wide-angle lenses, but at F2.8, the out-of-focus areas on my copy are irregularly shaped. The depth of field scale is listed for F5.6, F11, and F22.
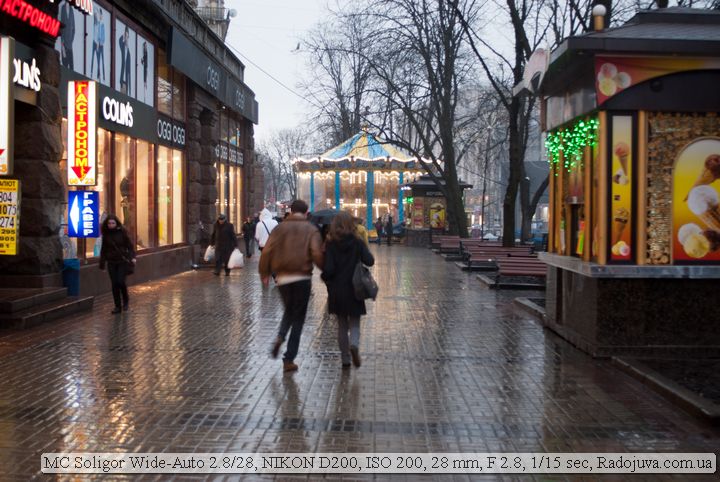
Photo on MC Soligor Wide-Auto 1: 2.8 F = 28mm
3. On DX cameras, this wide-angle lens will turn into a normal lens with a 42mm equivalent focal length. More details in the article about crop factor. Generally, it's difficult to find a good, old, fast lens for DX cameras and other crop-sensor cameras from other manufacturers. If you're looking for a wide-angle lens on a cropped sensor at a low price, consider the Samyang 14mm f/2.8 IF ED UMC Aspherical, which might also be a good choice on full-frame. Personally, for wide-angle photography on cropped cameras, I use the Tamron 17-50mm F2.8 autofocus zoom . If you're looking for a wide-angle lens to replace your kit lens among older, non-autofocus lenses, then heed my advice: a kit lens or superzoom like the 18-55, 18-70, 18-105, 16-85, 18-135, or 18-200 is the best wide-angle lens for cropped images. And if you really want a wide-angle lens, consider the MS Mir-73N and MS Mir-47.
Bokeh on MC Soligor Wide-Auto 1: 2.8 F = 28mm on MDF
4. The lens is multi-coated. The lens is well assembled . The body is metal, and the focuser ring is rubberized. I read somewhere that the lenses of this lens might be made of plastic, but that's a misconception, as at that time there was no technology for combining plastic and glass. And the lens's weight suggests otherwise.
Photo on MC Soligor Wide-Auto 1: 2.8 F = 28mm
5. Image quality is unremarkable. At F2.8 and focusing at infinity, it's difficult to achieve good sharpness; at shorter focusing distances, sharpness at F2.8 is normal, slightly soft. Stopping down to F8 increases sharpness significantly, but after F11, diffraction takes over and sharpness drops. The lens doesn't boast excellent sharpness at F2.8. Image contrast also increases with stopping down. Contrast is good. Color rendition is neutral. Most importantly, on my DX camera, distortion is very low for a wide-angle lens. This MC Soligor Wide-Auto 1:2.8 F=28mm has the same distortion as the longer Nikon 35mm F1.8G. Even with MC, this lens still captures highlights in backlit scenes and sidelight. Vignetting on a cropped matrix disappears at F4.0, and is barely noticeable at F2.8.
Sample photo on the Soligor F2.8 28mm
Advertising: If you are interested in this lens, you can purchase it by contacting us in the manual optics section.
Sample photo on Soligor 2.8 28mm
Examples of photos taken with MC Soligor Wide-Auto 1:2.8 F=28mm.
All photos were taken on a Nikon D200 camera, without processing, conversion from RAW to JPEG with 80% quality, downsizing to 1600 * 1200 and imprinting data from the EXIF module.
Based on my personal impressions, I found the PENTACON auto 2.8/29 MC much more interesting overall. I liked the Soligor Wide-Auto MC 1:2.8 F=28mm for its ease of use and compactness. I didn't like the viewing angle on the cropped frame.
Sample photo on Soligor 2.8 28mm
Comments on this post do not require registration. Anyone can leave a comment.
Conclusions:
The MC Soligor Wide-Auto 1:2.8 F=28mm will be of interest to those using full-frame cameras. The lens produces an acceptable image, but isn't particularly impressive.
This material was prepared by Arkady Shapoval . The greatest support for the site is if you use links on this site, such as Amazon , when purchasing anything . It costs you nothing, but for this site, and therefore for my family, it's the main source of support.
Many thanks to Alexander Perevera and Igor Tikhan for the opportunity to review the Zenithar-M 1,7/50 lens .
Review Zenitar-M
TTX Zenitar-M 1.7 / 50 (aka Zenitar-M 1.7 / 50) MDF: 45sm Optical design: 6 elements in 5 groups Focal length: 50mm Number of aperture blades: 6 pieces Diaphragm: F1.7-F16.0 The weight: 280 g Landing thread: M42 Front Filter Diameter: 52mm
This review features the Zenithar-M with serial numbers 859616 and 850340. There is a version of the MS Zenithar-M lens with multi-coating and a slightly smaller MDF; you can see the review of the MS Zenithar-M 1,9/50 . The Zenithar-M 1.7/50 was the standard lens for the Zenit-18 and Zenit-19 cameras. There is also a very interesting modification – the Zenithar-ME1 50 mm f/1.7 MS with only two aperture blades, which forms a square opening and produces a curious "grid" in the out-of-focus area at closed apertures.
View of the Zenatir-M lens 1,7 50 from different sides
Features of the lens Zenitar-M 50 1.7
1. Focusing ring moves smoothly, slightly tight. The minimum focusing distance is 45cm, infinity starts at 15 meters on the scale on the lens. The focusing ring itself rotates approximately 270 degrees. When focusing, the entire lens unit moves. When focusing, the “trunk” is lengthened by about a centimeter. The depth of field indicators are plotted for diaphragms 4, 8, 11, 16 and, most likely, for 2.8, but without a numerical designation. On the aperture scale, you can set the values 1.7, 2, 4, 8, 11, 16 and, most likely, F2.8, F5.6 without a digital designation.
Enlightenment of the front and rear lens of the Zenitar-M lens
2. The lens has an excellent maximum aperture of F1.7 , allowing for a very shallow depth of field. Considering that on cameras with a 1.5x crop factor, the equivalent focal length is 75mm, and on a 1.6x crop factor, the equivalent focal length is 80mm, the lens can be used as a decent portrait lens. It has only six aperture blades. If you're looking for a portrait lens for a crop factor, consider the Helios-44 in white.
3. The lens is well assembled. The first copy that I visited was with the backlash of the focus ring. But my second lens was made very high quality.
Sample photos on Zenitar-M 1.7 50mm
4. The diameter of the front filter is 52mm, you can easily find a protective or specialized photo filter. When focusing, the front group of lenses does not rotate, which simplifies working with the lens.
Sample photos on Zenitar-M 1.7 50mm
5. The lens has a blinking aperture. It's convenient that it can be disabled with a dedicated switch , allowing you to set the aperture manually. The lens doesn't have a preset aperture ring.
Sample photo on Zenitar-M F1.7 50mm
Sample photos on Zenitar-M
All photos are unprocessed. Unloading from RAW -> JPEG Q80%, resized to 1600 * 1200, data from EXIF imprinted. Everything was shot with Nikon D200, Nikon D40, Canon 350D.
How to use with modern cameras?
Lenses with mounting thread M42 (M42 X 1 / 45.5), such as the lens from this review, are very easy to use on almost any modern digital camera (both SLR and mirrorless), for this it is enough to choose the right adapter (adapter). You do not need to carry out any additional steps to modify the lens.
There are adapters with a chip that provide greater convenience during shooting. These chips are typically used for focus confirmation and/or exposure metering, as well as for generating correct EXIF data. The presence of a chip does not affect image quality in any way.
For some SLR cameras (for example, with the Nikon F-mount), you need to use adapters with a corrective lens, which allows you to focus correctly at all focusing distances. For any mirrorless cameras, such a lens is not needed, and the adapter is a simple decorated hollow metal tube with an appropriate mount.
If you have any questions on compatibility and adapters - ask in the comments (comments do not require any registration at all).
Portrait on Zenitar-M 1.7 50
Image Quality at Zenitar-M
The Zeninar-M lens delivers sharpness even at its widest aperture of F1.7 . And it's not just relative sharpness, it's quite normal. Sharpness only increases as the aperture is closed and is present across the entire frame (taking diffraction into account). Distortion on a cropped sensor is minimal. The lens produces a nice, smooth, and soft bokeh at full aperture. The image is contrasty. Color rendition is decent. It's a bit sensitive to backlighting, but generally handles side light well. There's not much else to say—it's simply a high-quality 50mm lens.
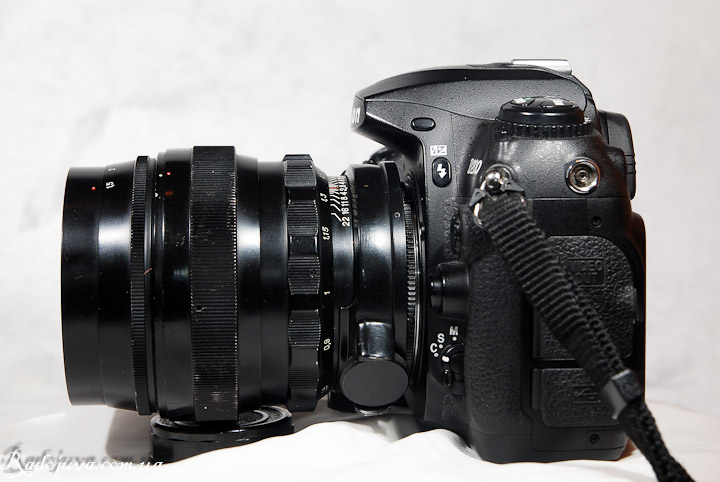
Zenitar-M on a modern camera
Personal impressions
I liked the Zenithar-M 1.7 50mm. The owner of a Zenithar capable of focusing at infinity claims that you can even shoot landscapes at F1.7. Among Soviet 50mm lenses, I usually recommend the Helios-81n and Helios-77m-4, and now I'll also recommend the Zenithar-M 50 1.7mm. I recommend checking out the voting section for the best Soviet 50mm lens , where the Zenithar-M takes a respectable third place.
Sample photo on Zenitar-M F1.7 50mm
You can judge the sharpness yourself:
Zenith-M lens sharpness
Backlight, the lens is still afraid. Example photo with hard backlight below.
Example photo with hard backlight below
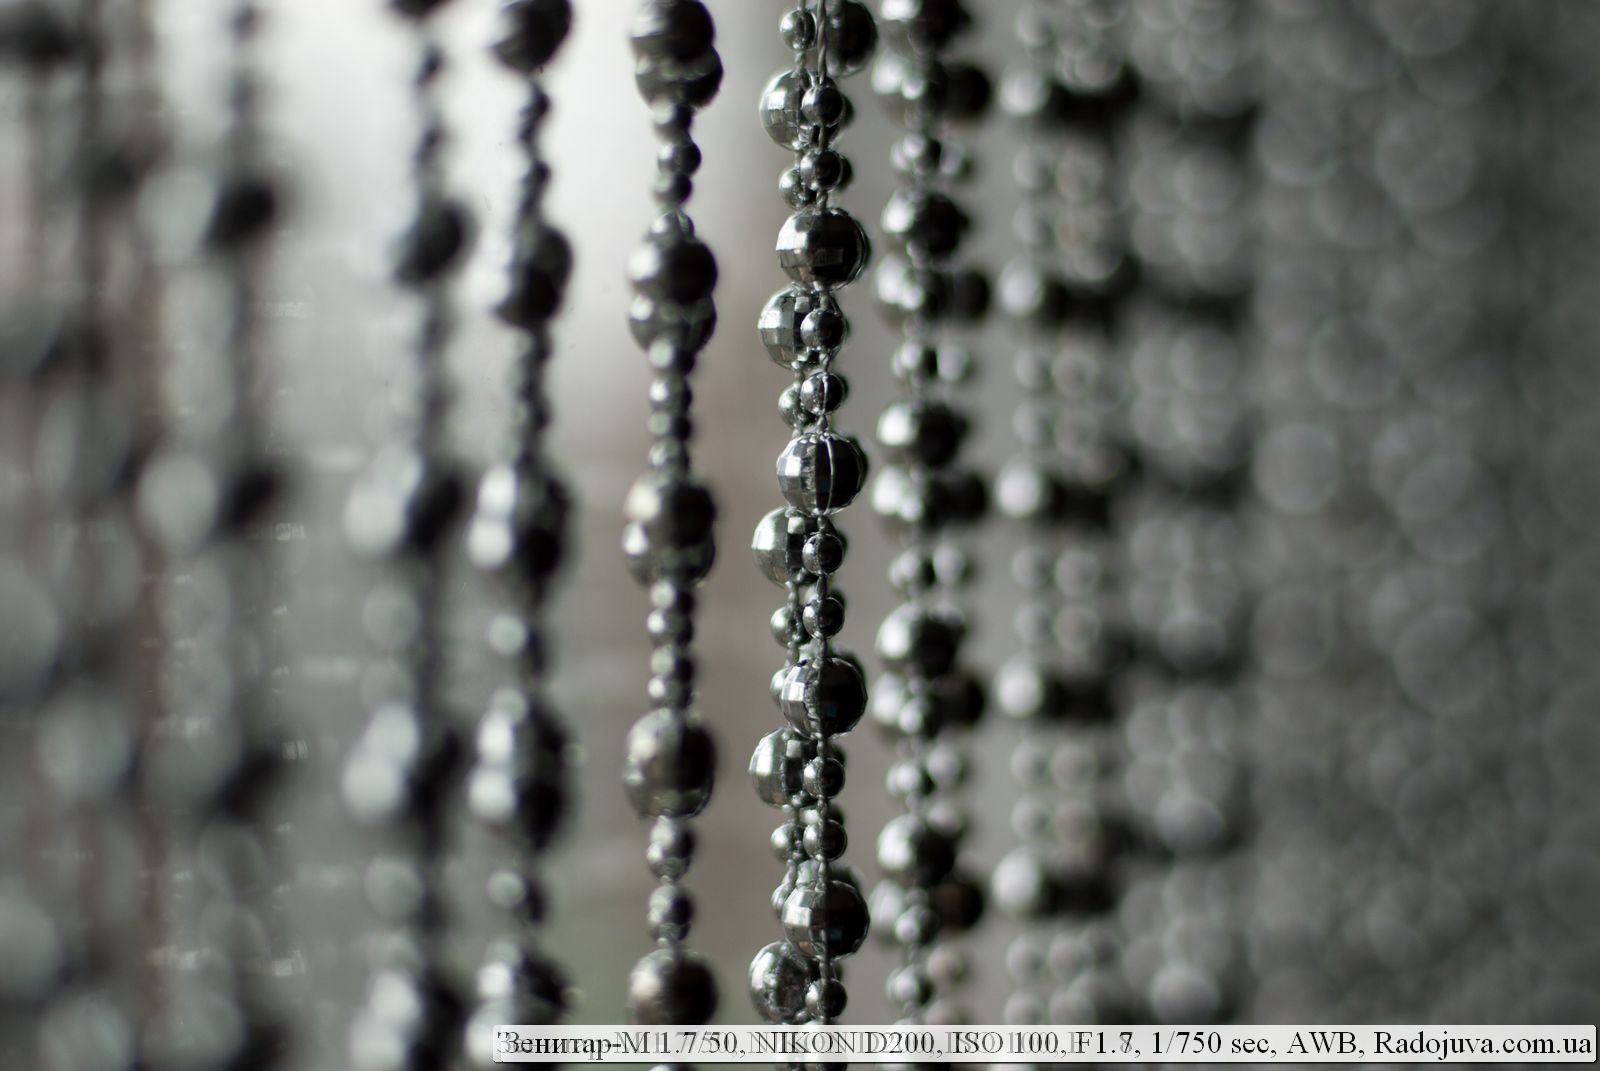
But the blurring of the background on a fully open aperture is simply gorgeous.
Background blur on Zenitar-M
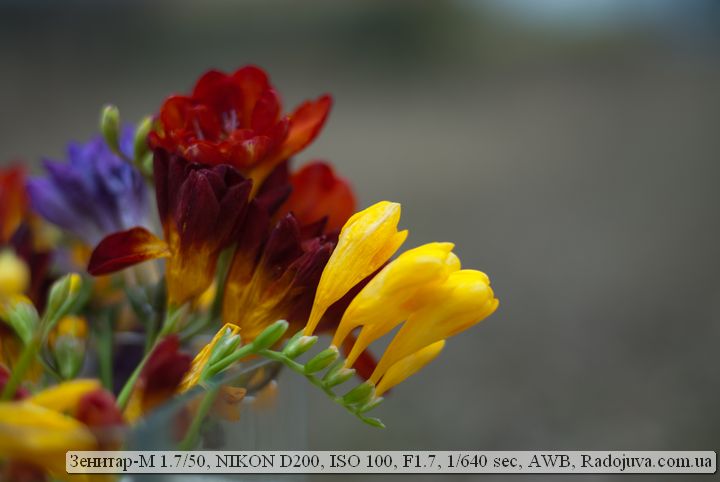
Color rendition on the example of a photograph with flowers.
Color rendering Zenitar-M
Zenitar-M has a shallow depth of field at F1.7
Background on the Zenith-M went into kissel
You can view the catalog of modern lenses of the brands 'Zenitar' and 'Helios' at this link.
Comments on this post do not require registration. Anyone can leave a comment.
Final World
The Zenithar-M 50 1.7 is an excellent fast prime lens. It offers good sharpness at all apertures and a pleasant bokeh wide open. I highly recommend it.
This material was prepared by Arkady Shapoval . The greatest support for the site is if you use links on this site, such as Amazon , when purchasing anything . It costs you nothing, but for this site, and therefore for my family, it's the main source of support.
In my vote for the best Soviet portrait lens , the Helios-40-2 is the undisputed leader, by a huge margin. Second place goes to the most widely-used prime telephoto lens, the Jupiter-37A, and the insanely sharp Kaleinar-5N rounds out the top three. So, without further ado, the Helios-40-2 is ideal for portrait photography.
Helios-40-2 has a tripod socket and black color
TTX Helios-40-2 The weight: about 900g MDF: 0.8m Focal length: 85mm Front Filter Diameter: 67mm Factory manufacturer: Krasnogorsk Mechanical Plant named after S.A. Zvereva Aperture Limits: F1.5-F22 Number of aperture blades: 10 Optical design: 6 elements in 4 groups, Biotar scheme Resolution: 36/17 lines / mm (center / edge)
There are lens modifications, in particular, the differences may relate to the diameter of the filter and the minimum focusing distance. Also, there is an earlier “white version” of the lens called simply Helios-40. Read about the differences below.
View Helios-40-2 from different sides. Case for Helios-40-2 and aperture view.
View of the Helios-40-2 lens on a modern central control wheel
The Helios-40 and Helios-40-2 are modifications of the Carl Zeiss Jena Biotar 1,5/75 lens . The Helios has a slightly longer focal length. The optical design is the same—6 elements in 4 groups. The Helios-40-2 is a classic Planar (Biotar) lens. Please note that in this review, I was using the Helios-40-2 , and I am writing about it. My lens has an 80cm MDF and a 67mm filter diameter; its serial number is 741174. Considering that the first two digits in the serial number of Soviet lenses usually indicate the year of manufacture, my Helios-40-2 is much older than me, having been manufactured in 1974. The lens barrel is slightly worn, but the lenses are in good condition, without scuffs or scratches, and the coating is intact.
View of the Helios-40-2 lens from the side on a modern central control gear
The main modifications of the Helios-40 lens (2)
Helios-401.5/85 for SLR cameras. Old white version without coloring. Uses M39 × 1/45,2 mounting thread.
Helios-40T 1: 1,5 F = 8,5cm - option for television cameras. G-40T differs from the regular version of the G-40 by aperture control and camera mount. Helios-40T has only one diaphragm ring. The optical design of Helios-40T is the same. In any case, it will be necessary to saw off the back for installation on a modern digital SLR camera. When you close the diaphragm on the G-40T lens, in the blur zone, you get the same "circular" saw, like his brother G-40. Produced at KMZ (Krasnogorsk Mechanical Plant named after S.A. Zverev, Krasnogorsk.)
Helios-40-21.5/85 for SLR cameras, has a M42 × 1 / 45,5 mounting thread. The main difference from Helios-40 is only in the landing thread, body color and tripod socket. The Helios-40-2 version itself also has options with minor differences. For example, there are options with a 66 mm filter and 1.15 m MDF.
Cyclops 1.5 / 85 (Aka CYCLOP 1,5/85) for night vision device. The main difference is the different frame and the complete absence of a diaphragm. Perhaps Cyclops has a different enlightenment. There is also a version with the name in Latin 'Cyclop 1.5 / 85'. The lens was produced at ROMZ (Rostov Optical and Mechanical Plant). Overview here.
New Helios-40-2issued by KMZ in 2012 year. There is a modification Helios-40-2-N 1,5 / 85 or HELIOS-40-2-N 1,5 / 85 under Nikon F and Helios-40-2-C 1,5 / 85 or HELIOS-40-2-C 1,5 / 85 for Canon EOS and HELIOS-40-2 1,5 / 85 for M42 thread. Since 2014, it has a new body design and double-layer coating, without a tripod foot.
HELIOS-40 F = 8,5cm 1: 1.5 - lens prototype for cameras with bayonet mount Contax-Kiev (the lens came with an external mount). 1950-1951, MDF 1 meter, looks like this.
The first myth is the opinion that Helios-40 was copied from some very ancient and not popular lens. Often give an example Leica Summarex 1,5 / 85 or Cyclops 1.5 / 85, produced at the Rostov optical-mechanical plant. Summarex is a real myth. Regarding Cyclops, everything is just the opposite, Cyclops was a copy of Helios-40 without a diaphragm. Many photos on Cyclops can be found here.
There is an opinion that the aperture of the lens is actually not F / 1.5, but F / 1.3, motivate this by the fact that according to GOST there was no value of 1.3, therefore they wrote 1.5. Thus, the lens is credited with a much greater aperture.
There is a myth that with the help of Helios-40 anyone can take a gorgeous portrait. It's a delusion. The lens is very difficult to work with. Achieving good image quality with the right focus point and the right composition will take some hard work. This is due to the fact that Helios-40-2 is sharp at F1.5 only in the center, and the depth of field is very shallow. Only a person with experience in manual optics can cope with Helios-40-2.
There is a myth that one photographer in his entire life tried all the latest very expensive photography technique, super modern digital backs, switched from full frame to medium and large format, but he never found the lens that would give the image that he wanted to receive. As a result, he accidentally stumbled upon Helios-40 and discovered the full power of the "Solar" lens, with which he began to create masterpieces. Perhaps this is not a myth. But my personal opinion is that this is a delusion, since every more or less self-respecting photographer understands that he is the one who takes pictures, and not the technique, because it is important how to photograph, and not by what means. If you are chasing an “interesting” technique, then you can miss the very opportunity to shoot, and sometimes miss your whole life.
A lot of various information on the Internet and beautiful photos. The myth is that almost all photos come with quite serious processing, at least with an auto contrast or b / w, which does not show a real Helios-40-2 picture. In reality, the raw picture from Helios-40-2 does not look as interesting as after processing. Therefore, just keep this in mind when choosing between Helios and another lens.
Bokeh on Helios-40-2 85mm F1.5
The main features of the Helios-40-2 lens:
1. In the Helios-40-2 lens design, almost everything is made of metal and glass. The lens is older than me, and continues to please with its work. This is a serious indicator of excellent build quality.
Photo on Helios 40-2 85mm
2. The lens has a very fast aperture for this focal length. The maximum aperture is F1.5. This is only 1.15 times less than the classic F1.4 for portrait lenses with 85mm focal lengths. The difference between the F1.5 and the cheap 85mm F1.8 fixes is exactly 1.44 times. The fast aperture is great for low light shooting. You can take off handheld in the evening without fear of lubrication.
Bokeh on Helios-40-2 85mm F1.5
3. 85mm focal length on the Canon 1.6x crop gives 136mm EGF. For a Nikon crop with 1.5x EGF, it will be 127,5mm. On crop Helios-40-2 also remains an excellent portraiture. The lens can and should be used at full frame, unlike Nikon DX or Canon EF-S lenses.
Photo on Helios-40-2 85mm F1.5
4. The lens has an additional aperture presetting ring. The aperture ring itself is located in front of the lens, and the preset ring is in the middle. Moreover, the pre-installation is very convenient, since its ring has a large grip. This is one of the few lenses where the aperture presetting ring is really handy. At the same time, the lens does not have a semiautomatic iris control (it does not have a diaphragm pusher for cameras).
Bokeh on Helios-40-2 85mm F1.5
5. The focusing ring operates smoothly. A serious drawback of the Helios-40-2 is that the focusing ring is mounted too close to the camera's bayonet mount. It's not very convenient to turn. Even worse, the tripod mount clamp, which is located even closer to the bayonet, interferes with focusing. At first, instead of focusing, you find yourself habitually turning the largest ring—the aperture ring. This is a bit unnerving, but you get used to it over time. The focusing ring is nut-shaped, not smooth.
Photo on Helios-40-2
6. Helios-40-2 has a tripod socket. This suggests that the lens is really heavy, the clamp is near the mount to the camera. The clamp can rotate 360 degrees on the lens and is fixed with a special lock, which twists and clamps the clamp. Tripod socket is standard.
Sample photo on Helios-40-2
7. The Helios-40-2 lens has a 10-blade aperture . While the number of blades is larger than average, closing it down creates an aperture resembling a circular saw. The bright spots in the out-of-focus area at closed apertures transform into a circular saw pattern. The Tair-11A, Jupiter-37A, Jupiter-11, and Jupiter-9 lenses have even more blades, and they form a fairly smooth aperture without any nuts or gears, making them more suitable for portrait photography at closed apertures. The only saving grace for the Helios-40-2 is that it produces its most interesting (from an artistic standpoint) image at its wide-open aperture of F1.5. Below is an example photo with circular saw blades in the out-of-focus area.
Bokeh on Helios-40-2 85mm F1.5 on aperture F3.5
8. The lens is quite heavy. On lightweight amateur CZK lenses, the weight balance may be an issue. I think I had the same problem when shooting with film Zenit lenses. On my kilogram-sized Nikon D200, the Helios-40-2 fits perfectly, without causing any discomfort. The D200's large grip makes the Helios-40-2 very easy to use. I often shoot with cameras heavier than the D200 and Helios-40-2 alone. The weight of the lens and camera helps prevent camera shake when handheld at long shutter speeds.
Portrait on Helios-40-2
9. The lens has enlightenment. I have never found reliable information about whether it is MS or not MS. The color of enlightenment is yellow.
Example photo on a Helios 40-2 lens
Sample photos on Helios-40-2
All sample photos in the review without processing. Convert from RAW to JPEG with Q80% quality (without auto levels, etc.), reduced the size to 1600 * 1200 and imprinted data from EXIF. All sample photos were taken on a Nikon D200 (crop factor 1.5x matrix). On my D200, the function key is configured to change the parameters of manual optics, therefore, it is very convenient to close the aperture to any value and immediately make adjustments to EXIF. Only, D200 allows you to set the minimum aperture only for values F1.2, F1.4, F1.8.
UPDATE 1
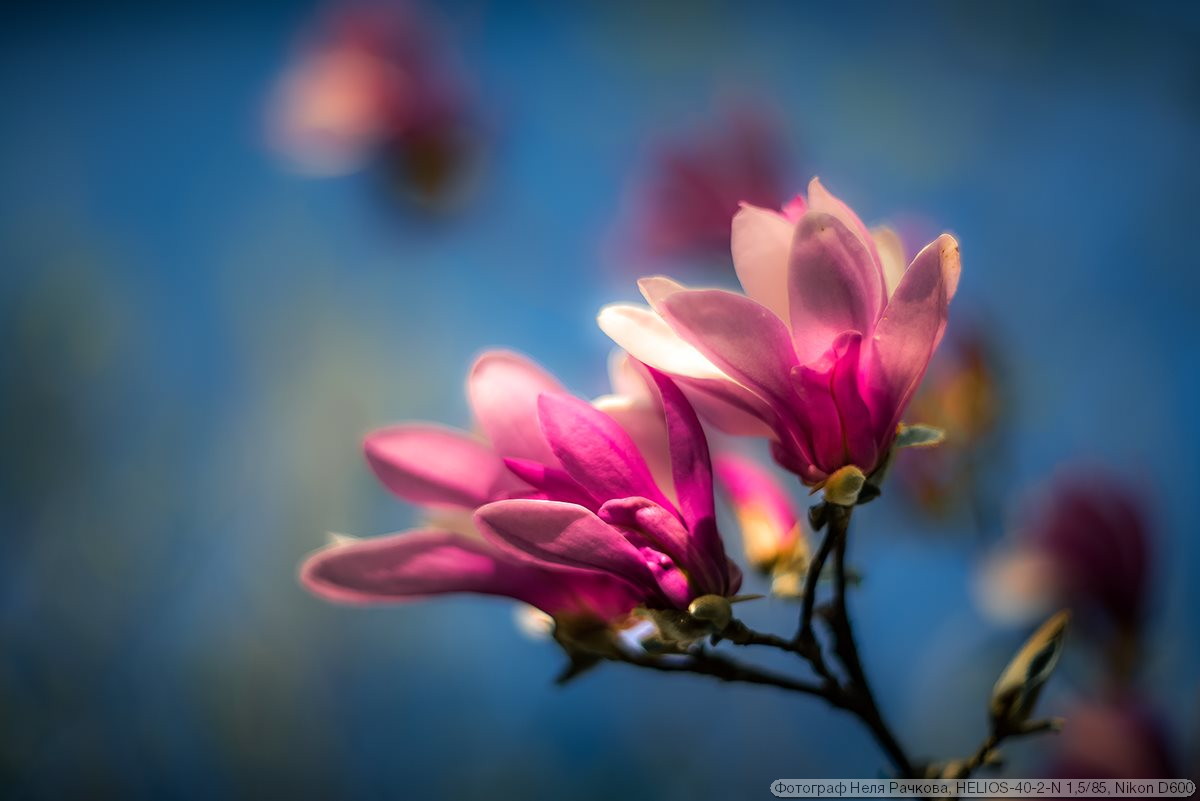
Photographer Nelya Rachkova shared examples of photos taken with the HELIOS-40-2-N 1,5/85 and a Nikon D600 camera with Radozhiva readers :
UPDATE 2
Photographer Igor Kurilov shared examples of photographs taken with the HELIOS-40-2 1,5/85 ( this one ) with readers of Radozhiva.
Every camera system has its iconic lenses—lenses that people worship and covet. For Nikon, it's the Nikon N AF-S Nikkor 85mm 1:1.4G , for Canon, it's the Canon LENS EF 85mm 1:1.2 L II USM , and for Soviet Optics, it's the Helios-40-2. This is a perfectly logical explanation, as there must always be an idol.
Example photo on a Helios-40-2 lens in strong lateral light
To buy or not to buy Helios-40 (2)?
If you ask such a question, then do not buy. People to whom it will really be useful know for themselves this and it will not be difficult for them to pay a tidy sum for the lens. I absolutely do not recommend Helios-40-2 to beginners who are looking for an addition to the whale lens. The best option for using the lens is in full frame. A full frame is not so cheap, people who shoot it have experience and will be able to get what they need out of Helios-40-2.
Portrait on Helios 40-2 in strong lateral light
Alternatives
By alternatives, I mean non-autofocus lenses with similar parameters. If you're looking for an alternative lens, there are many other options. Of the similar Soviet lenses, I recommend looking at the white version of the Jupiter-9 85mm F2.0 . The Jupiter-9 is an excellent portrait lens; it's quite sufficient for classic portraits. A little longer and much darker is the medium format MC Vega-28V 2.8/120 , which will allow you to take gorgeous portraits. Another excellent alternative is the relatively new and very high-quality Samyang AE 85mm 1:1.4 AS IF UMC (and
From the native optics for Nikon, you can look at the classic manual lenses Nikon Nikkor 85mm 1: 1.4 AI-S, Nikon Nikkor 85mm 1: 1.8 (and its many modifications) and Nikon Nikkor 85mm 1: 2. It is quite interesting that all these lenses have better sharpness and contrast characteristics throughout the field of the frame, but they are much less popular than Helios-40-2. Carl Zeiss Planar T * 1.4 / 85 and older Carl Zeiss Planar 1.4 / 85 C / Y options can also be an alternative. From modern autofocus optics, there are many options, but we are talking specifically about manual lenses with manual focus.
All autofocus 85s
Choosing a good 85mm portrait lens is very important for a large number of photographers. I pay a lot of attention to this issue, therefore I have prepared this list of all such autofocus lenses for full frame cameras with F <= 2 and a focal length of about 85 mm.
When people talk about the Helios-40-2's image quality, some mean artistic merit, while others mean technical excellence. The lens's artistic quality is truly captivating, with a distinctive character. Technically, the Helios-40-2 exhibits slight vignetting, around 1/3 stop at the corners of the cropped sensor. The vignette is virtually unnoticeable. The lens's sharpness varies significantly between the edges and the center of the frame. In the center, sharpness is excellent already at F1.5, and at the edges, sharpness increases at F2.8. The Helios-40-2 has an interesting sharpness curve. The loss of sharpness from the center is a characteristic feature of the lens. Sharpness wide open is sufficient for portraits. Interestingly, the Helios-40-2 has very low CA (chromatic aberrations). I was surprised that CA completely disappears at F2.0. For example, the Nikon AF Nikkor 85mm f/1.8D loses CA only at F4.0. Only a few lenses have such excellent CA at F2.0, such as the Nikon 85mm F1.4D and others. Like any other fast 85mm prime lens, the Helios-40-2 has minimal distortion, which helps prevent image distortion. At wide apertures, the Helios-40-2 exhibits slight spherical aberrations (blurred edges), which make the image appear ethereal (see the monocle section). Contrast at wide apertures isn't particularly good. The lens struggles with side and backlighting. Color rendition is a bit warm, but the automatic white balance of modern cameras easily handles this. And, of course, bokeh is the lens's strong point. Out-of-focus areas produce a colorful, swirling background. The circles of blur are slightly compressed, resembling ellipses. The lens rotates the background most at the edges of the frame when the aperture is fully open.
It so happened that all the advantages and disadvantages are collected in Helios-40-2 in an unusual way and make it really a lens with character. In particular, Helios-40-2 is impeccable for creating portraits where smoothness, volumetricity and strong sharpness are not needed (especially for a female portrait).
Photo at Helios 40-2
Personal impressions
I liked the lens. I focused solely using the green dot in the viewfinder of my Nikon D200. Focusing is quite difficult, but my experience with manual optics helped. I highly recommend using Live View for focusing. Personally, I like that people are trying to squeeze maximum quality out of the Helios-40-2 with a mediocre MTF – it forces you to take photos and practice your dexterity, rather than just pressing the shutter button. Since I don't have a full-frame camera, it's hard for me to fully judge. Personally, I use the lightweight autofocus Nikon AF Nikkor 85mm f/1.8D lens , which many people have forgotten about but which produces predictable results. There's a lot of discussion online about the quality of photos taken with the Helios-40-2 lens. Please note that this can only be about a specific example, as the equipment is quite old and many people are judging it by the poorly executed Helios-40-2; many have simply never held one in their hands. There's also a lot of debate about its price. In reality, to buy a Helios-40-2, you only need to shoot one or two weddings or a few photo sessions, so professionals shouldn't have any problems. Amateurs, however, won't always be able to extract the full potential from the Helios-40-2 and realize the scenes where the Helios-40-2 would be a useful photographic tool.
Photo on Helios-40-2
Prices
An updated version of this lens is now available. You can check current prices for the lens in online stores at this link.
How to use with modern cameras?
Lenses with mounting thread M42 (M42 X 1 / 45.5), such as the lens from this review, are very easy to use on almost any modern digital camera (both SLR and mirrorless), for this it is enough to choose the right adapter (adapter). You do not need to carry out any additional steps to modify the lens.
There are adapters with a chip that provide greater convenience during shooting. These chips are typically used for focus confirmation and/or exposure metering, as well as for generating correct EXIF data. The presence of a chip does not affect image quality in any way.
For some SLR cameras (for example, with the Nikon F-mount), you need to use adapters with a corrective lens, which allows you to focus correctly at all focusing distances. For any mirrorless cameras, such a lens is not needed, and the adapter is a simple decorated hollow metal tube with an appropriate mount.
If you have any questions on compatibility and adapters - ask in the comments (comments do not require any registration at all).
Final World
The Helios-40-2 isn't the best lens from a technical standpoint, being only sharp in the center of the frame at F1.5. From an artistic standpoint, it offers unrivaled image quality with its legendary swirling bokeh. In any case, the Helios-40-2 on full frame will be of interest to professionals . For amateurs with a cropped sensor, I wouldn't recommend it.
When exploring Soviet Helios lenses, I recommend starting with the inexpensive and widely available Helios-44-2 2/58 (aka HELIOS-44-2 2/58) . You can also check out modern ZENITAR and HELIOS lenses using the following links.
Comments on this post do not require registration. Anyone can leave a comment.
This material was prepared by Arkady Shapoval . The greatest support for the site is if you use links on this site, such as Amazon , when purchasing anything . It costs you nothing, but for this site, and therefore for my family, it's the main source of support.
Many photographers know about a very unusual and interesting effect using the zoom.
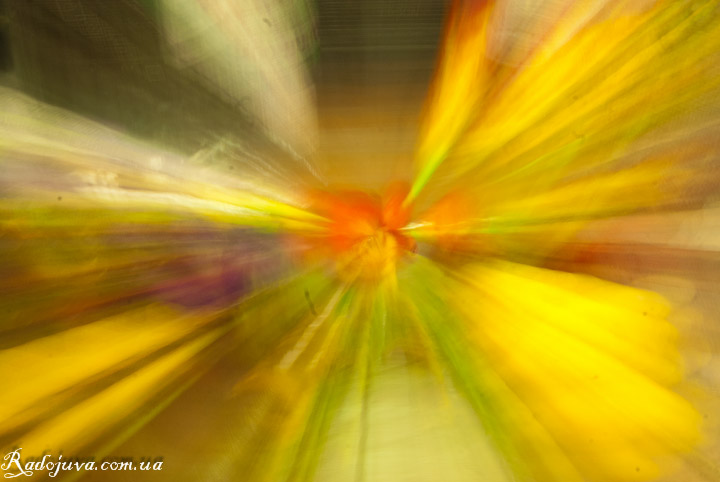
Zoom effect. Photo tricks from Radozhiva. Part 6
This effect is called the zoom effect . To achieve this unique image perfectly, we need a tripod and a camera with a zoom lens. But even without a zoom lens, a regular prime lens will suffice.
Sample photo
A simple zoom method:
We choose the place we like, which we will shoot. It is very desirable that it be evening or night time, as we need a very long exposure. Mount the camera on a tripod. We set up the camera on a tripod for the correct composition of the frame. We select the shutter priority mode, on the CZK (digital mirror cameras) this mode is denoted as S (from Shutter speed), or Tv. We select the maximum allowable shutter speed, usually 30 seconds. In this mode, the camera itself will select the desired aperture. I advise you to turn off the automatic ISO and set the minimum acceptable - usually this is ISO 50, 100, 200, sometimes Lo1. Press the shutter button, or use the remote control. The first part of the time interval, we just wait until the matrix is exposed (while the camera is shooting), and then with a sharp movement we change the focal length (change the zoom). On the CZK, the zoom is rotated manually, on compact digital cameras this may be a problem and it will be impossible to change the zoom during shooting. The second part of the time, we just wait until the camera takes the next part of the picture. Then the picture with the zoom effect is ready.
It is important to see how the picture will look at two different zoom values in order to evaluate the final frame.
Problems shooting with this zoom effect:
1. It is physically impossible to fix the lens, it requires either a zoom lens or legs and the use of multiple exposure.
2. You need a good, powerful and reliable tripod. As you can see, my zoom effect did not work out as I wanted. When I twisted the zoom on my tripod, the camera trembled and made unnecessary blur. I have a pretty children's tripod Velbon CX-888 / F.
3. To get this effect during the day, you need several neutral filters to get a long shutter speed.
4. For a perfect "drag" zoom effect, you need a lens with a very smooth focal length. My Tamron 17-50mm F2.8 turned out to be not very suitable and with smooth zooming gives an image with jerks, no matter how I tried. Jerks are shown by red arrows in the example below.
5. When zooming not to the extreme positions of the lens focal length, it is very easy to make a mistake. For example, on my 17-50mm for an idea with a zoom effect, you first need to shoot at 50mm, and then reduce the zoom to 35mm, with a sharp decrease in the zoom ring, you can fly over or undershoot to 35mm. As a result, sometimes you have to shoot multiple takes.
Zoom effect. Photo without Photoshop
If in the shutter priority mode for 30 seconds and the minimum iso, the camera writes that the aperture cannot be closed more strongly, then you need to either reduce the shutter speed or use a neutral filter, sometimes several. The fact that the camera cannot select the shutter speed on Nikonov is indicated by the inscription in the field of aperture values HI (high) - this means that the aperture value should be higher than the lens allows. To get the maximum shutter speed, you can put the camera in aperture priority mode and close it as much as possible (increase the F number). Also, you can use the shutter control mode by hand B (bulb). Personally, I did all the examples in the manual image management mode, it’s more convenient for me.
Classic zoom effect to create a cast effect
A variation of this effect can be achieved by using a smooth, rather than abrupt, change in focal length, with the highlights forming a sort of "stretchy" light line . This effect is sometimes more interesting than the usual version. Below is an example of a photograph taken with a zoom pull at a 30-second shutter speed. The frame features a jar of flowers.
Classic zoom effect to create a viscous effect
The second zoom method without zooming
The same method can be implemented not only with the help of long exposure, but also with the help of multiple exposure. Multiple exposure is carried out either several times with different focal lengths, or with a fixed distance, but you will need to move the camera itself. How to do this - you will find a multi-exposure in the article.
Such effects are often used when shooting a city at night, night scenery, New Year's paraphernalia, and any other creative shooting. Anyway, I recommend just playing around with your DSLR and trying to come up with an interesting composition. You can check out more long exposure tricks
Shooting at long shutter speeds with a zoom lens can produce interesting artistic effects , examples of which are shown above. The key to achieving this effect is the ability to use a long shutter speed and zoom, or multiple exposures . Since multiple exposures can be achieved on a computer, even the most basic digital camera can create this zoom effect.
Many thanks to Alexander Perevera for the opportunity to review the Pentax K10D .
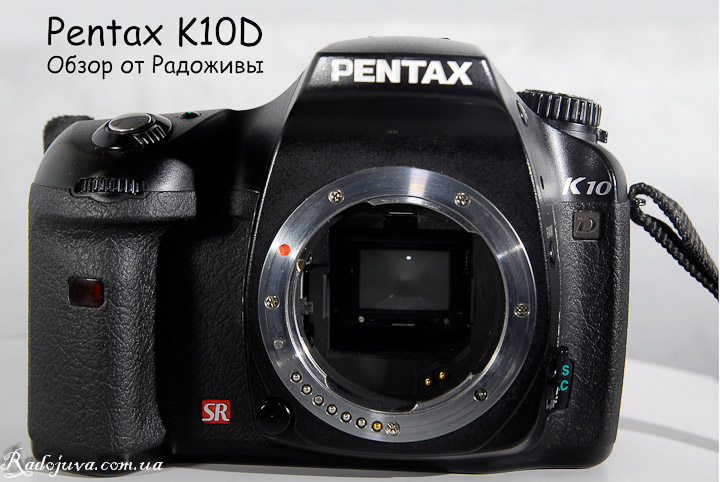
View Pentax K10D
The Pentax K10D was released back in the fall of 2006, and in 2007 the Pentax K10D was voted the best camera of the year, so the K10D is a pretty interesting model. When you pick up the Pentax K10D you feel that the camera is weighty, very well assembled. The Pentax K10D is marketed as a semi-professional model, just like the Nikon D80 or Canon 30D. By the way, the camera is actually somewhat reminiscent of cameras like Canon 10D, 20D, 30D. At the moment, the Pentax K10D is outdated. In early 2012, it can only be found on the secondary market for a modest price of 300-400 USD. And the camera has a full clone - this is Samsung GX-10.
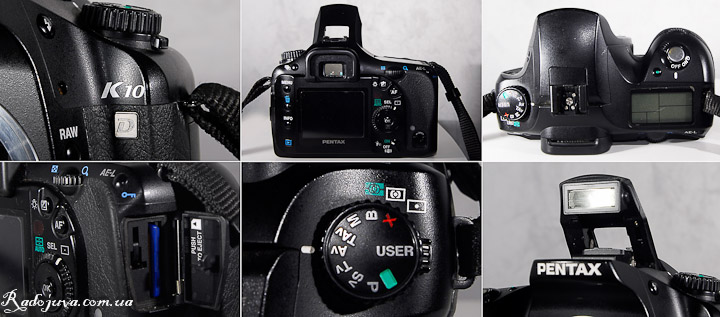
View Pentax K10D from different sides
Pentax K10D has on board:
1. CCD with 10 megapixels... The Pentax K10D is a camera from the days when manufacturers made cameras with CCD sensors. 10MP is more than enough for basic photography tasks, personally I still shoot with 10MP Nikon D80, D200. Anyone who has already come across SLR cameras will understand that the difference between 8 and 12 megapixels is very small. I will say more, it is very difficult to feel the difference even when printing, here is a clear example in the article, the battle of megapixels.
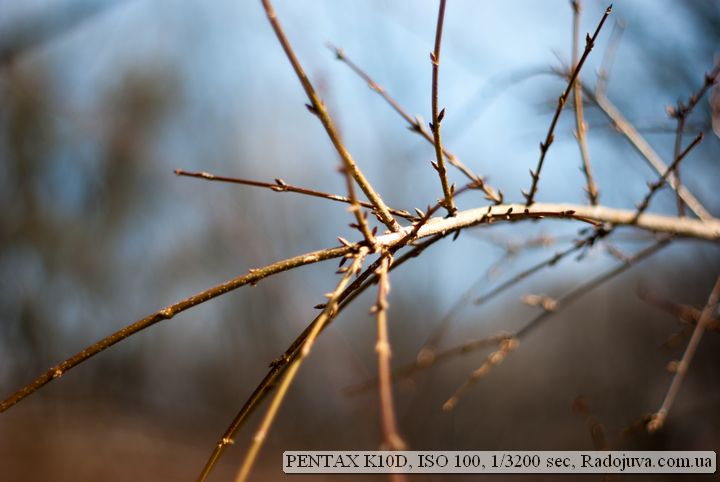
Photo on Pentax K10D
2. The Pentax K10D is an APS-C camera. It has a 1.5x crop factor , meaning you need to take into account the reduced field of view provided by the lens when using it. For example, when using the SMC Pentax-M 1:1,4 50mm lens on the Pentax K10D, the field of view will be narrower, and the equivalent focal length will be equivalent to a 75mm lens on a full-frame camera. More details can be found in the article about crop factor. It's a shame that it's already 2012, and Pentax still hasn't released a full-frame camera. However, Pentax does have a medium-format camera, the Pentax 645D.
Photo on Pentax K10D
3. The camera has a built-in focus motor , which allows it to focus with non-motorized lenses. For example, the camera will focus with the non-motorized Pentax SMC-FA 50mm f/1.4. This allows you to save on autofocus lenses and use old non-motorized lenses from film cameras.
Photo on Pentax K10D
4. Good build quality . The bottom of the camera says "Made in Philippines." When using it, you can tell it's well-made. The Pentax K10D is one of Pentax's first APS-C cameras, and it's likely well-made. There's also a rubber plug on the bottom for attaching the battery grip. A battery grip can be purchased separately . Most importantly, the camera is dust- and moisture-resistant —a compelling choice.
Pentax K10D sample photo
5. The ISO range is 100-1600 . Manual ISO settings allow you to select intermediate values, such as 160, 640, and so on. A nice feature of the camera is that in automatic mode, you can set both the maximum and minimum ISO. This is very convenient and useful; adjustments are made very easily using the front and rear selectors. Regarding the so-called working ISO, ISO values above 400 are marked in yellow in the camera itself, suggesting that it's best not to shoot at these values. Noise is already noticeable at ISO 400. Shooting at ISO 1600 is possible, but with extreme caution. The camera doesn't boast a clean image at high ISO settings.
Pentax K10 D sample photo
6. White balance can be set automatically, or choose from a large number of typical settings. Also, it can be set by a pattern. The BB camera guesses more or less normally.
Pentax K 10 D sample photo
7. The Pentax K10D has an additional monochrome display , the usefulness of which is hard to overstate. A monochrome display is a sign of good ergonomics. I find it very comfortable to use. The display is backlit, which is activated by the exposure compensation button.
Pentax K10D sample photos
8. The main display is 2.5 inches and has only 210.000 dots . The display was quite decent for its time. However, by today's standards, it's still small and has poor viewing angles. I wouldn't recommend viewing footage on it.
Pentax K10D sample photos
9. The camera has a menu for editing footage. You can correct the RAW footage. For novice photographers and ordinary people, this is a nice little thing. For example, I recently found out that my Nikon D200 does not have such a menu and I could not play around with the RAW image settings in the camera.
Photo at Pentax K10D
10. The camera can shoot in two RAW modes: DNG and PEF. Pentax deserves special credit for the DNG feature, as it has at least made some progress in solving the problem of RAW data standardization. For those unfamiliar, DNG is a unified RAW format that any processing program should be able to read. On average, a DNG RAW file is 16MB, while a PEF file is 12MB.
Photo taken at Pentax K10D
11. Frame Buffer. The only thing that matters to me is the buffer when shooting in RAW. If you choose DNG, the camera can hold 11 shots, but only 9 in PEF format . This is a good figure for a camera of this age. It allows the camera to shoot without lag for the first 3-4 seconds.
Photo taken at Pentax K10D
12. 3.3 fps shooting speed . Not much, but enough. 3 fps is quite enough for amateur purposes. Considering that a higher shooting speed requires a larger buffer, which increases production costs, 3 fps is just right for a camera of this type. For example, I don't chase high shooting speed and still shoot with a Nikon D40 with its 2.5 fps. Just keep in mind that high shooting speed is only needed by professional photographers; for the average person, 2 fps is enough. Always remember that it's not what you photograph with, but how you photograph.
Pentax K10 D sample photos
13. The camera uses SD HC cards. My Pentax K10D made friends without problems with a 16 GB SD HC class 10 card. When shooting in RAW, it is always important to have a large voluminous memory card, or several spare ones.
Pentax K10 D sample photos
14. The Pentax K10D has a built-in image stabilizer , which helps increase shutter speed by 2-4 stops. You can use image stabilizer with any lens . This is very important when shooting handheld . And you don't need to buy lenses with image stabilizer; it's all built in. It's a very useful feature. But personally, I think the Pentax K10D's image stabilizer actually works at about 2 stops. Image stabilizer mode is activated with a special button on the camera body.
Photo taken at Pentax K10D
15. The Pentax K10D has an unusual sensor cleaning function . It can be configured to turn the camera on or off. When you hold the Pentax K10D, you can actually feel something working inside, and you think it's cleaning the sensor. But this isn't a panacea; you'll have to clean the sensor manually after a year or two of use. Unlike many other cameras, you can actually hear the "dust shaker" cleaning system working.
Photo at Pentax K10D
16. The autofocus has 11 focus points . Quite sufficient for comfortable operation, with 9 of them being cross-type. The autofocus is excellent and has different modes.
Photo at Pentax K10D
17. There are so many useful little touches. The camera has a dedicated button for switching between RAW and JPEG , and the battery and memory card doors are well protected from accidental opening. There's an excellent photo preview feature —you can do this by rotating the power switch even further. You can also preview the final image without saving it, or view the depth of field—I give the Pentax a big thumbs up for this simple and effective solution for previewing depth of field and the image. The Pentax K10D also has a bracketing button and a multiple exposure function.
Photo on Pentax K10 D at high sensitivity
18. The camera supports manual optics . Exposure metering and focus confirmation are available. The only issue is that when using older Pentax lenses, the camera doesn't read the aperture value. For older M42 or M39 threaded lenses, the Pentax system is one of the best, as it meters exposure and provides focus confirmation. For example, some Nikon cameras don't meter exposure and lose infinity with manual M42 threaded lenses, and Canon cameras don't provide focus confirmation.
Photograph by Pentax K10 D
19. SV and TAV modes on the shooting mode dial. These unusual modes prioritize ISO sensitivity when setting the desired exposure. The camera's shutter speed ranges from 30 seconds to 1/4000 of a second . 1/4000 is sometimes too slow for shooting with a fast lens in bright daylight. The minimum shutter speed when syncing with flash is only 1/180 of a second . For example, a simple Nikon D40 can shoot with flash at 1/500.
Photograph by Pentax K 10 D
20. The battery is quite powerful, can easily withstand 1000 frames without a flash. It all depends on how to use the camera during filming, as well as on the lens that is used on the camera.
Pentax K10 D sample photos
21. Metering of the Pentax K10D is pretty well implemented. He is mistaken very rarely. The built-in exposure meter has only 16 segments, but this does not interfere with giving the correct exposure metering.
Pentax K 10 D sample photo
All sample photos in this review were taken with the Pentax K10D without any processing (automatic conversion from RAW and JPEG with file size reduction and EXIF watermark added). You can also view sample photos taken with the Pentax K10D in the galleries:
Prices for modern Pentax cameras in popular stores can look at this link.
You can ask a related question in the comments , and we'll definitely get an answer . You can also express your opinion or describe your experience. You can find many small photo accessories on Aliexpress.
The Pentax K10D is a great value for money option. It's perfect for those who prefer manual focus lenses. The Pentax K10D has low ISO performance. However, it does have a built-in image stabilizer and well-designed ergonomics.
Comments on this post do not require registration. Anyone can leave a comment.
This material was prepared by Arkady Shapoval . The greatest support for the site is if you use links on this site, such as Amazon , when purchasing anything . It costs you nothing, but for this site, and therefore for my family, it's the main source of support.
Many thanks to Alexander Perevera for the opportunity to review the Sears Auto/MultiCoated 135/2.8 lens.
AUTO Sears MC 135mm F2.8
Please note that there are several versions of the AUTO Sears MC 1:2.8 f=135mm, one of which, the Mod. 202, had macro capability. My Sears copy is older and has a minimum focus distance of only 1.5 meters. I cannot comment on the optical design or other specifications. The AUTO Sears MC 1:2.8 f=135mm lens has a K-mount for use on the Pentax system.
View AUTO Sears MC 135mm F2.8 from different sides
Features of the Sears MC 2.8 135 Lens
1. Focusing on the lens is convenient and pleasant. Infinity starts at 30 meters. The lens's MFD is only 1.5 meters. For example, the similar Jupiter-37A lens has a MFD of 1.2 meters. When focusing, the front element extends 2-3 cm. The focusing ring rotates 250 degrees , the action is smooth, and the ring itself is rubberized. Naturally, the lens is manual focus only.
Sample photo on AUTO Sears MC 135 2.8
2. The lens aperture has only 6 blades, which is quite small for a lens of this class. The depth of field indicator has a definition for F5.6, 11, 22. The aperture values themselves can be set to the values: 2,8 4 5,6 8 11 16 22
3. AUTO Sears MC 1: 2.8 f = 135mm has a built-in lens hood, which is not very effective, but still helps to avoid flare. Hood and MS poorly helps the lens in the fight against flare.
Photo by AUTO Sears MC 135 2.8
4. Sears MC 1: 2.8 f = 135mm has good build quality. Almost all lenses of the last century have very good build quality.
5. Multi-enlightenment the Sears MC 1: 2.8 f = 135mm lens is multi-layered. But AUTO Sears MC 1: 2.8 f = 135mm is afraid of flare and side light.
Portret on AUTO Sears MC 135 2.8
6. Front filter diameter - standard 52mm. When focusing, the front lens group does not rotate, you can safely use light filters. In any case, finding a protective filter is not difficult. Usually, old optics are used by professional photographers who know a lot about the image and they often have to play with different kinds of light filters to get the desired effect.
Infinity on AUTO Sears MC 135 2.8
7. Lenses in the 135/2,8 class are highly prized because they make excellent portrait lenses. They blur the background beautifully . The lens is Made in Korea. They know how to make high-quality equipment in the East.
Photo by AUTO Sears MC 135 2.8
Image quality
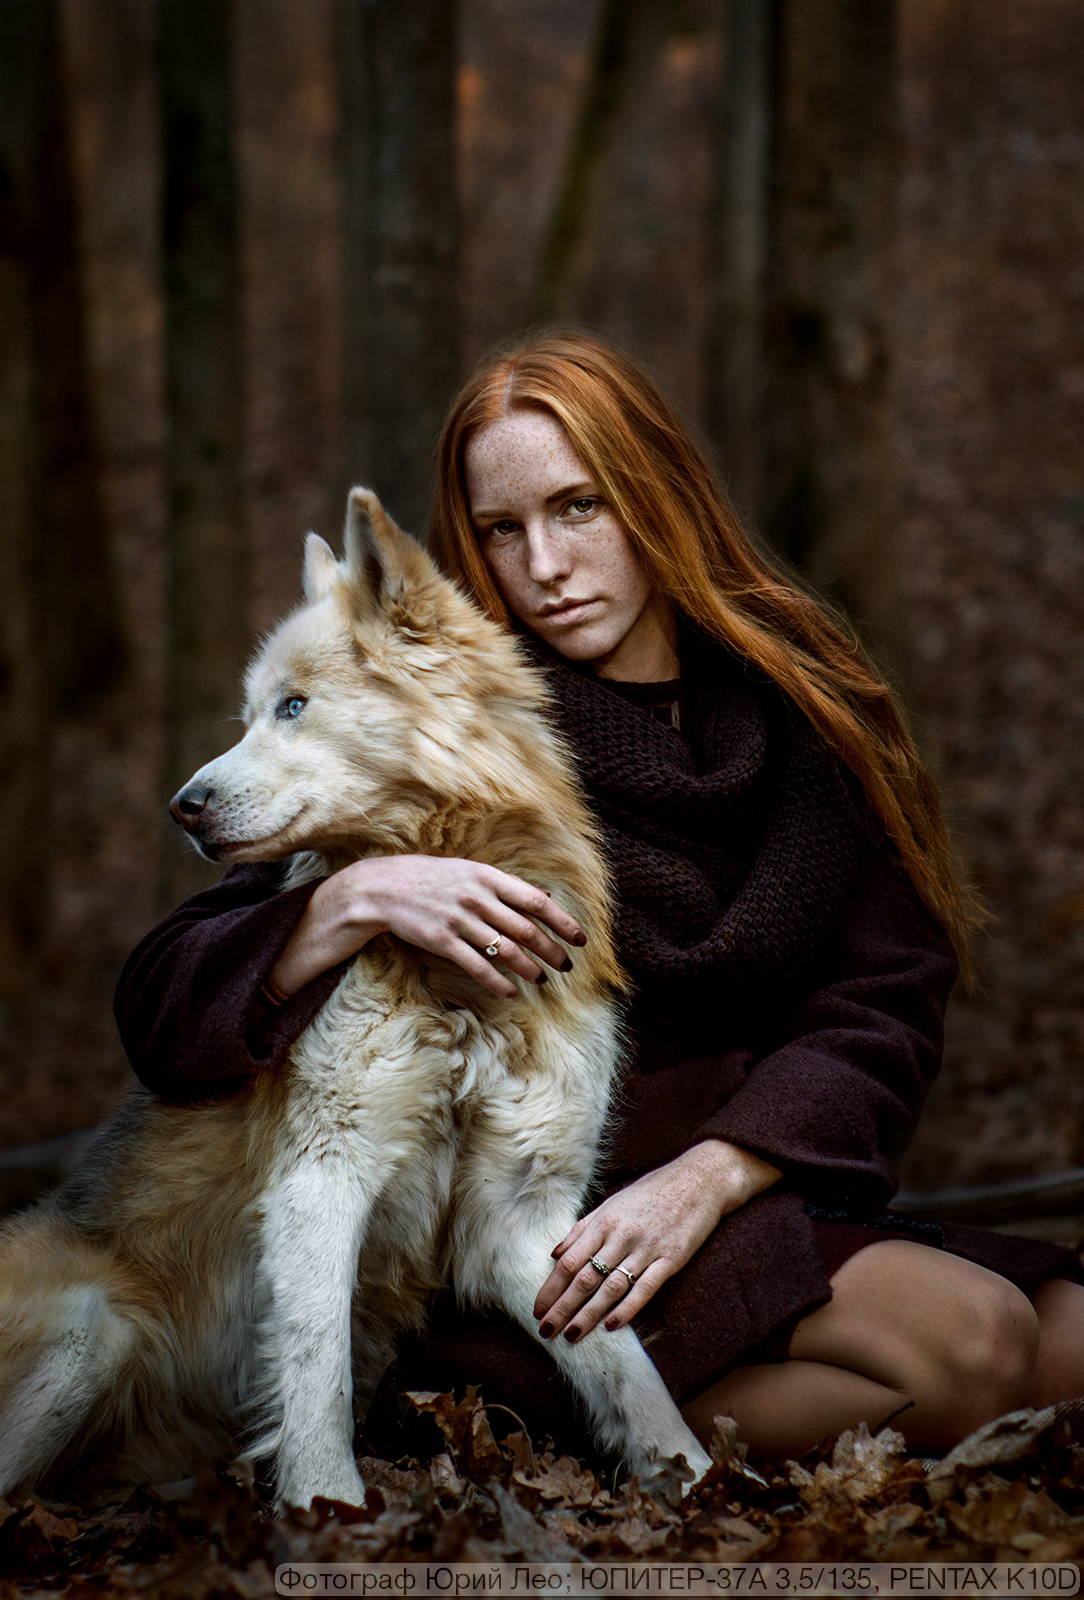
Let's be clear right away that the Sears Auto/MultiCoated 135/2.8 lens featured in this review was repaired and lost all its sharpness afterward. The image is soft at all apertures, with obvious spherical aberrations and strong CA. However, according to the lens owner, the lens had normal sharpness before the repair . In any case, the lens produces a rather interesting image, and I really liked the bokeh , whether due to the soft effect or because the Sears Auto/MultiCoated 135/2.8 lens truly has an excellent image. I didn't observe any distortion or vignetting on the cropped sensor. If you're considering a similar lens, I recommend checking out our Soviet-era Jupiter-37A, or any of the others from the section on the best Soviet 85-135mm lenses.
Example photo on AUTO Sears MC 135 2.8
Sample Photos at Sears 135mm f / 2,8
All photos from this review were taken on a Pentax K10D camera in DNG (RAW) format, converted using Adobe Lighroom to JPEG Q80%, without processing, only the size was reduced to 1600 * 1200 and the data from EXIF was imprinted. Perhaps not all aperture values from EXIf are correct, since I wrote them from memory.
How to use Sears MC 1: 2.8 f = 135mm on modern Pentax cameras:
I used Sears Auto / MultiCoated 135 / 2.8 lens on a Pentax K10D camera. It's a pity that Pentax does not have the ability to drive the optics in full frame (as of spring 2012, Pentax does not have a full-frame camera). The Pentax K10D automatically meters exposure at full aperture. When mounted on a Pentax, Sears will always open the diaphragm and will only close during the shutter release. The only inconvenient moment when shooting with closed apertures is that the camera does not understand that the aperture is closed, and always sets the shutter speed for a fully open aperture. A sound signal or a green hexagon in the viewfinder will notify about the focusing accuracy.
View AUTO Sears MC 135mm F2.8 on the central locking
Comments on this post do not require registration. Anyone can leave a comment.
Final World
The Sears MC 2.8/135mm is an excellent short, fast prime telephoto lens . My copy has a distinct soft effect. The Sears MC 1:2.8 f=135mm AUTO is attractive primarily for its price and pleasing bokeh.
This material was prepared by Arkady Shapoval . The greatest support for the site is if you use links on this site, such as Amazon , when purchasing anything . It costs you nothing, but for this site, and therefore for my family, it's the main source of support.
Many thanks to Alexander Perevera for the opportunity to review the Cosina 200mm 1:4 MC Cosinon-T lens.
Cosina 200mm 1: 4 MC Cosinon-T
The Cosina 200mm 1:4 MC Cosinon-T is a telephoto prime lens for Pentax film cameras. The Cosina 200mm 1:4 MC Cosinon-T features a K-mount, making it compatible with modern Pentax DSLRs. In fact, I haven't seen the Cosinon-T available with any other mount. The lens's optical design is unknown.
Cosina 200mm 1: 4 MC Cosinon-T lens view from different sides
Features of the Cosina MC Cosinon T 200mm F / 4 Lens
As for a 200mm telephoto, Cosinon-T is very compact and lightweight. Cosinon-T is all made of metal and glass. On the case you can find the inscription Lens Made In Japan, which promises good quality lens and photographs.
Photo at Cosina 200mm 1: 4 MC Cosinon-T
The lens aperture has a total of 6 blades, which when closed give a hexagon and nuts in the bokeh. The maximum aperture is only F4.0, which is a rather low indicator for a fixed lens. Due to the low aperture and long focal length, you need to be very careful, taking off.
Photo at Cosina MC Cosinon T 200mm F4
The lens has a very large minimum focusing distance. MDF is as much as 2.9 meters. Almost three meters - this is very inconvenient when trying to focus on a nearby object. Personally, I was very surprised and saddened by this fact, because in order to remove a sparrow on a tree two or three meters away, I had to not approach the fidget bird, but, on the contrary, move even further. The focus ring rotates 270 degrees. Focusing is pretty simple. Of course, the lens only has manual focus. After 30 meters, infinity begins on the scale of the lens. When focusing, all the lenses move in the middle of the tube.
Photo at Cosina 200mm 1: 4 MC Cosinon-T
The Cosina 200mm 1: 4 MC Cosinon-T has an integrated telescopic hood. But it does not help a bit when working in side or backlight, just a nice addition to the lens. The hood extends forward by about 4cm.
Photo at Cosina 200mm 1: 4 MC Cosinon-T
Only the values F8 and F22 are shown on the depth of field scale. And the diaphragm itself can only be set to fixed values F22, 16, 11, 8, 5.6, 4.
Photo at Cosina 200mm 1: 4 MC Cosinon-T
The lens has multi-enlightenment. Front lenses give off a purple glow.
Photo at Cosina 200mm 1: 4 MC Cosinon-T
The ratio of aperture and focal length allows you to control the depth of field well. At the full frame, Cosinon-T could be used as a good portrait portrait, but in the spring of 2012, Pentax does not yet have a full-frame digital SLR camera. And on the Cosina 200mm 1: 4 crop, the Cosinon-T becomes “long”.
Photo at Cosina MC Cosinon T 200mm F4
Image quality on Cosina 200mm 1: 4 MC Cosinon-T
I was very upset by the quality of the picture. The Cosinon-T lens gives very strong HA up to the F8.0 aperture, sharpness at 4.0 is low. The contrast is low. Color reproduction is normal. Distortion is minimal, vignetting is also minimal. Regarding sharpness, a fixed lens should give better sharpness. Normal photos are obtained somewhere with F8.0. I shot mainly on F8.0-F11.0. Perhaps I have not the most successful instance. Bokeh can’t boast anything special.
Photo on Cosina MC Cosinon T 200mm F4 in strong side light
How to use on modern Pentax digital SLR cameras?
I used the Cosina 200mm 1:4 MC Cosinon-T lens from this review on the Pentax K10D camera without any problems. Focus accuracy is indicated by an audible alert or a green hexagon in the viewfinders. When mounted on the camera, the lens's aperture opens fully. You can sight in at full aperture, and the camera automatically closes it to the set aperture during shooting. When used on some cameras like the Pentax K10D, shooting at closed apertures may be difficult, as the Pentax K10D and some other cameras cannot read the aperture setting using the aperture ring. Therefore, the exposure meter will indicate the shutter speed required for a fully open aperture, but in reality, the aperture closes to a different value during shooting, resulting in an underexposed, dark image.
View of the Cosina 200mm 1: 4 MC Cosinon-T lens on a modern camera
Sample photos on Cosina 200mm 1: 4 MC Cosinon-T
All photos were taken on a Pentax K10D camera. In the review, all photos without processing, on-camera JPEG of maximum quality, size reduced to 1600 * 1200 pixels, data from EXIF is imprinted. Perhaps the diaphragm data is not always correct, I write it from memory.
Also, you need to remember that on Pentax digital SLR cameras, the lens will give a narrower viewing angle, and the EGF of the lens will be as much as 300mm, which turns the Cosina MC Cosinon T 200mm F / 4 into a nice long telephoto. As you can see in the examples of photographs, it’s quite easy to remove birds and non-bullying animals on it. Due to the large focal length and low aperture of the lens, be careful not to get a blurry picture - for more details, see How to take pictures with your hands.
Photo at Cosina MC Cosinon T 200mm F4
Comments on this post do not require registration. Anyone can leave a comment.
Final World
Cosina 200mm 1: 4 MC Cosinon-T - tele fix lens. Picture quality is not particularly good up to F8.0 aperture. Perhaps it’s just not the most successful instance.
This material was prepared by Arkady Shapoval . The greatest support for the site is if you use links on this site, such as Amazon , when purchasing anything . It costs you nothing, but for this site, and therefore for my family, it's the main source of support.































Discussion