Modern digital photography is very much associated with image processing programs. Sometimes, just the photo editor creates exactly that photo, which we ultimately consider the work of the photographer.
RAW converter
Modern digital photography is insidious, sometimes it turns into ordinary mathematical tricks, which I already wrote about in articles'Subpixels', 'Gigapixels', 'JPEG", "Tricks with RAW'and'RAW setup'. Any photograph taken in the so-called raw format - RAW, for printing or viewing on a computer must be converted (converted) into a simpler format with an unambiguous representation of the data. This program is usually called a RAW converter ('rav-converter'). There are just a lot of such converters, but due to the specifics of the raw files of each individual camera, the converters sometimes cannot recreate the “correct” photo from this raw data. It is often said that for the best results you need to use only the “native software” that sometimes comes with the camera.
Below is my experiment that everyone can repeat. The essence of the experiment is very simple - you need to convert the same raw file with different converters and see what happens :) The photo from the experiment was taken on Nikon Nikkor-SC Auto 1: 1.4 f = 50mm, I specifically chose a lens without microprocessor contacts to exclude any specific image enhancement by the converter by correcting lens imperfections from the database. The picture was taken in difficult lighting conditions: very cloudy weather, two flashes.
Link to the archive with photos. (The archive takes 96.9 MB to view the packed files, the archive should be unpacked). Attention: the photos are not for the faint of heart, they are especially dangerous for scammers and pixel worms :)
The archive contains the following files:
- DSC_5549.NEF - original RAW file obtained during shooting. Nikon D700, 14bit, lossless compression, control vignetting, ADL, noise reduction at slow shutter speeds, noise reduction at high ISO - were off. All shot in Picture Control mode SD (standard mode): contrast correction - 0, brightness - 0, saturation - 0, hue - 0, sharpness - position 5 out of 10. White balance - "flash". If you turn on all the native "improvements", then third-party software copes with displaying data even worse. EXIF You can look at any available program that you are used to. If there is no such program, then it is easy to do using the service on http://regex.info/exif.cgi.
- DSC_5549.JPG - original JPEG file obtained during RAW + JPEG shooting, settings are described above. JPEG L with quality priority.
- DSC_5549 (acr-original) .jpg - file converted with Adobe Camera Raw 6.0 (ACR 6.0) in default mode.
- DSC_5549 (acr-auto) .jpg - file converted with Adobe Camera Raw 6.0 in auto mode.
- DSC_5549 (capturexn2-original) .jpg - file converted with CaptureNX 2 v 2.4.5 in default mode.
- DSC_5549 (capturexn2-pt) .jpg - file converted with CaptureNX 2 v 2.4.5 with PT selected capture mode.
- DSC_5549 (lr-auto-tone) .jpg - file converted with nude Adobe Photoshop Lightroom 5.2 using the 'Auto tone' command. When exporting to JPEG, the quality was 100%, other settings were default.
- DSC_5549 (lr-original) .jpg - file converted using nude Adobe Photoshop Lightroom 5.2 in default mode with standard profiles installed along with the LR setting. When exporting to JPEG, the quality was 100%, other settings were default.
- DSC_5549 (photoshop-from-original-jpeg-with-auto-levels) .jpg - this is how the processed on-camera JPEG looks like with Photoshop's “auto levels” command.
- DSC_5549 (viewnnx2-after-quick-adjust) .NEF - this is what ViewNX 2 did from the original RAW when installed white balance 'Calculate automaticaly' and PT mode is selected.
- DSC_5549 (viewnx2-auto-pt) .JPG - ViewNX 2 on install white balance 'Calculate automaticaly' and PT mode is selected.
- DSC_5549 (viewnx2-original) .JPG - ViewNX 2 by default
- DSC_5549 (inverted original jpeg) .JPG - original JPEG rotated 90 ° for viewing with built-in utility for Windows OS
- picassa-view-original-nef-file.jpg - this is how the original RAW file looks when viewed by Google Picassa, a screenshot of the program window.
No comment.
Configuring a converter is a very delicate and necessary task.
I would like to share some experience of using converters. I really like the way native ViewNX and CaptureNX display a photo. In order to reproduce the image as accurately as possible - since I saw it on the camera display and in real life, I use the “native” converters. Refinement (retouching, color correction and other boring routine) is done in Photoshop. I like a bit of a sadistic mechanism: first correct the original RAW (NEF) file using ViewNX, export the result to TIFF (16-bit uncompressed), and then finalize it in Photoshop. Thus, I get the parameters of the photo closest to the original. ViewNX has three very strong negative aspects:
- changes the original RAW file, after which the camera will not see it
- no noise reduction function, which greatly limits ViewNX when converting images at high ISO
- requires tremendous computing power
CaptureNX is also a very interesting and very useful converter with many subtle "native" settings that other converters do not have (for example dust removal function) But for some reason, he didn’t take root with me, I use it only for very thoughtful picking in RAW files.
Well, of course, Lighroom comes in handy when you need to deal with large file sizes. Nothing better for batch processing RAW has yet been invented :) I already began to notice that I behave like a gamer - when working in LR, I keep my left hand near the 'asd' keys for quick access to some functions. There is nothing better than turning on LR in the evening, pressing the letter 'F' twice (switch to full screen mode) and starting to fancy a photo.
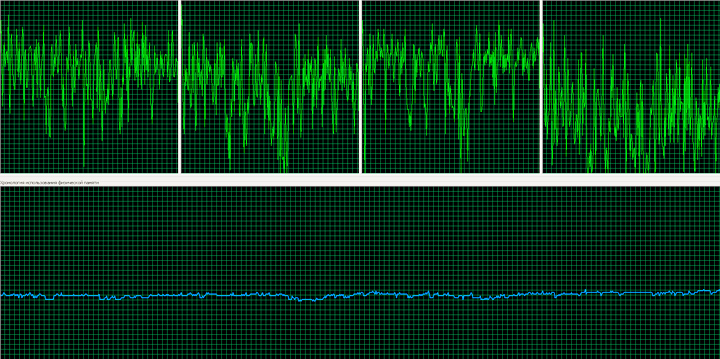
LR load when processing photos in the Develop tab. Processor I3-3240, 8GB DDR3
Leave your thoughts about converters in the comments.
Thank you for attention. Arkady Shapoval.

I do jeepegi in picas, ditches in lightroom. NX was terribly stupid on a beech, and when it got a powerful PC it didn’t even try. Used to Lightrum, there is no desire to try something else. Master the lightroom to the end)))
What attracts me to NX is that I immediately see the photo exactly as it was live. Light, color all this does not require correction at once. This saves tons of processing time. Well, the volumes are not the same. Photo for exit: ~ 100 clicks -50 takes, -20 unsuccessful composition. A maximum of 30 remains. Of these, 20 are “I was there” reports and this is just one click development. In fact, 10 photos come to thoughtful processing. (2 of them for print, +3 for the Internet album) Pros are different and they certainly need other tools. I heard LightRoom is very popular with them.
I use Aperture on iMac. The matrix on the IPC monitor is well calibrated from the factory, by the way. I do everything in Aperture and color correction, and BB, and retouching, and noise, cropping and horizon. Aperture stores the originals unchanged; it stores all changes in a separate small file. You can make a bunch of versions and return to the original at any time without losing anything. For friends, export to jeep is also in it.
Arkady, many thanks for the site. I am a amateur photographer, I have learned a lot of useful and new from you. Photographic equipment Nikon.
as they say it is better to see once :)
Fujifilm S5 Pro - convert RAF with different editors and compare with in-camera JPEG
http://vmirefoto.blogspot.ca/2013/06/fujifilm-s5-pro-raf-jpeg.html
in general, one of the best converters - only for MAC. or through a virtual machine.
to be honest - you hesitated to advertise a blozhik.
the link above - paired photos of different converters. What do not you like? There are no advertisements, there are no calls to buy something either.
Are you envious that there are useful materials somewhere? Do not read or follow links.
Arkady can make a claim, but not you.
buy rrrs!
+ + + + + + + +
to be honest, Sergei really flooded everything. Not a single thought is complete without your review. Moreover, at least half of the statements boil down to doubting the words of other participants and reposting thoughts from other forums about the photo. “Kenon is preferable for skin tone than Nikon. Nikon's dirty green-gray tint on the skin is indestructible. " Stelmakh was then criticized for such words, and you climb there, and even do not refer to him with almost direct quotation.
In short, I'm tired.
The in-camera jeep was not considered at all. Theme about RAW!
Hello Arkady. If you allow a few questions inspired by the theme of "RAW converter".
1. What does batch processing in lightroom mean, because all the photos are almost different?
2. I also encountered such a problem as printing images after post-processing (capture nx2, namely, I can’t print with all these changes (I print at home on the printer), maybe there is a universal algorithm so that all changes in connection with the processing are saved?
3. The capture nx2 version 2.4.1 itself (downloaded from the Internet), so how much is it different from version 2.4.5?
Thanks for the quality review.
Arkady, you wrote that “I really like the way the native ViewNX and CaptureNX display a photo”.
Does this mean that importing nefs from the camera using the Lightroom program seems to you a more losing option than using the native ViewNX and CaptureNX converters? What exactly is this loss?
After all, you quite rightly noted that “Lighroom is very helpful when you need to cope with a large volume of files. There's nothing better for batch processing RAW yet. ” So I want to understand whether it makes sense to convert in a native program, and do all further work (cataloging, post-processing, just viewing, export to jpeg, etc.) in the Republic of Lithuania?
Each task has its own solution.
After a long ordeal with Photoshop, I switched to my native Nikon program (the benefit of the computer allows), after all, the native color program still has the best color rendering.
DSC_5549 (photoshop-from-original-jpeg-with-auto-levels) .jpg - this is how Photoshop “auto levels” processed by the on-camera JPEG look like.
This option seemed preferable to me in the final picture.
it's better not to rely on a picass :)
Each manufacturer has its own Raw-converter. Since third-party programs “do not know” all the “secrets (tricks)” that the manufacturers have laid down in technical and software products. As an option - the simplest automatic translation in the native converter to TIFF, and then fine-tuning the image in LR, ACR, etc.
Usually I use LR - for a large number of files it is still convenient, the only thing infuriates him - he alone knows the scheme according to which he makes auto-correction, it is too light, then too dark - all the same you have to level it with your hands. Native Kenonovsky seemed too little functional and stupid (yes, I understand that everything is about Nikon, but I would like to see the canonists :)). For strong correction I already use Photoshop. Now, if it had the same wonderful function to open all files at once (as it is done in ЛРе) - it wouldn’t have a price :) (if there is one and I didn’t see it, please indicate it). One oddity of LRa, when pinching in JPG, the picture quality somehow changes noticeably (less contrast and saturated or something)
I tried a lot of converters for Windows platform, converters on Mac remained untested - Aperture, RPP.
Unfortunately, third-party converters do not work well with color (in my opinion and taste, of course). This applies to Nikon RAW (NEF) cameras. I did not observe such a problem with Canon. There, when opened in a third-party converter (for example, Adobe camera raw), everything coincides with the pre-rendered JPG embedded in the CR2 file. Therefore, Nikon has to use the native Capture NX 2, which, to put it mildly, does not shine with convenience. There are no “hot keys”, the program requires a lot of resources, does not fight overexposures as well as other converters. But in my opinion, it gives the most accurate transmission and requires a minimum of edits. For "hard" cases, you have to use a bunch of Capture NX2 -> TIFF 16 bit -> Photoshop -> JPG.
And in order not to be unfounded, I post the archive with the photo converted in different converters, namely Capture NX 2 2.4.5, Capture One 7.1.6, DxO Optics Pro 9.1.1 and Lightroom 5.3. Everyone makes conclusions. Your opinion is interesting, Arkady.
http://yadi.sk/d/OwNJ_KSiFbm92
I will comment for Canon: DPP works much better with RAW than Lightroom 3.6. Many times I noticed that Lightroom spoils photos more than DPP. therefore, recently I use only DPP. Well, then from the finished TIFF I make JPEG another program. Extra work, but Adobe and Canon marketers are still dumb.
Personally, although I shoot with Nikon, I still use LightRum for processing. I really like the color rendering of the native Nikon programs, but the speed with which they work is simply disgusting. And this is despite the fact that I assembled my computer myself - it has a 6-core processor and enough RAM even for video processing. But NX persistently refuses to work fast. It is a pity !!! (((In my opinion, he has a very good noise reduction and an excellent sharpening algorithm. But I have to sacrifice these functions because I simply don’t have enough patience for slow work. And I think if the result is liked by the viewer, then maybe everything else is just prejudice, because it is probably impossible to achieve perfection in the digital photo-world. Film is another matter ...
there is such a photographer Medvedev. Once he took it out:
Wonderful photo - a photo looking at which people say what a wonderful photo
3 Excellent - a photograph even without looking at which people say that it is wonderful
4 The right photo is a great photo
4a Correct exposure - exposure of the correct photo (transcript 1)
4b The correct skinton - the skinton of the correct photo (decoding 2)
4c Correct equipment - equipment with which the correct photographs are taken (decoding 3)
5 Wrong photo - looking at which people are talking not about what is shown there, but about how
6 Wrong technical parameters - technical parameters of the wrong photo
7 Correct technical parameters - technical parameters of the correct photo
8 It doesn’t matter what technical parameters - the technical parameters of a wonderful photo that did not become excellent
the rest can be read on the link,http://www.mywed.ru/forum/all/view/4260/
there s fun :-)
Judging by the 6 cores, you have a processor from AMD, the current microarchitecture has not very high performance per core. But Capture NX 2 itself is apparently not so well parallelized and even 4 cores cannot evenly load. Therefore, look towards the high-frequency core i5 / i7 then this program will work for you quite acceptable.
2 konstantin
“One oddity of LRa when compressed in JPG, the quality of the picture somehow changes noticeably (less contrast and saturated or something”
Faced a similar problem.
It is solved by the integration of the color profile during export.
how to turn it on? Sorry, I'm stupid something.
For a long time I have been using three converters Capture NX2, Lightroom (ACR), Capture One.
Short:
1. Capture NX2
Advantages: the best and fastest in local correction, there is everything and correction for points and masks and blending modes and much more. Correct image display, you can apply various settings that are available only when shooting in JPG, see the focus point, etc.
Disadvantages: slow scaling, slow batch processing, works only with NEF, does not work with directories (only with separate files).
2. Lightroom
Advantages: user-friendly interface, fast and convenient batch processing, convenient to work with the system of presets. Universal.
Disadvantages: not able to work with the session (directories only)
3. Capture one.
Advantages: The most convenient and flexible interface, convenient work with color. Able to work with both session and directories.
Disadvantages: Slow and resource intensive. Can display the profile of the camera crookedly (it saves the search for a profile from another camera or adjustment). Inhibited local correction tools. Curve Curves tool.
Usage:
I mostly use Capture NX2 for portraiture or creative, when I want to tinker with a single photograph for a long time.
Lightroom - for streaming, bulk processing (this is where all my main work goes)
Capture One - I never use it for portrait processing, sometimes I process nature, cityscape.
Sergey, thanks for the accuracy in a nutshell, I would love to know if you use any literature on Capture NX (I would like something besides the manual). I'm just starting to deal with Capture - it's very interesting. I have been using ACR for a long time.
Denis on Nikon's office has instructions in Russian. In fact, there is nothing complicated in Capture NX, the main thing is to understand the principle. For example, in local correction there are two ways, either you first make a mask and then select the correction tool, or vice versa, first apply the correction to the entire image and then hide it where you need to apply the correction, and then you can apply the overlay modes, opacity. There are four tools for creating masks, these are points, selections, a brush and a gradient. With a plus - apply with a minus to hide. A simple example, for example a photo of a person, the task of darkening the background. Select a new step with the curves tool and darken the entire image further with the selection point tool with plus put control points on the background and with minus on the person. As a result, the darkening effect will be applied to the background without affecting the person. Understand the principle and then everything will go like clockwork.
Thank you, Sergey! I will definitely use tips!
Hello! Can you hear the opinion of professionals about the method of processing NEF in JPG through the menu of the camera itself? Much worse than a computer and special programs? It’s just that sometimes on vacation without a computer, acquaintances need to give photos from their camera. Thank you all in advance!
Personally, I prefer the result (color, brightness and sharpness) from the in-camera processing of NEF, processed the same photos in the converter and in the camera, using logically the same adjustments. When printing, photos processed in the camera turned out to be the most juicy and pleasant to perceive in color. If you get a hold of it, understanding how the settings work when shooting in Jpeg, you can get a very high-quality result without processing.
In-chamber processing has its drawbacks :(, the inscriptions on the buttons are erased and the very rubber bands swell with time, though Nikon, even Japan.
about the outlet appeared, I hope she pays you well enough for her advertising, let this agreement bring success to the joyful !!))
I'll make a reservation right away - I'm an amateur, I photograph only family and friends.
For the most part I use the "stock" software "Photo Gallery" to edit photos from the package "Windows 2012 Basic Components" (http://windows.microsoft.com/ru-ru/windows-live/essentials - do not consider it an advertisement, during installation you can select only a photo gallery).
98% of the photos are drawn only by him, but of course thanks to the principle voiced by Vadim:
“I have said more than once and I will repeat myself - initially correct camera settings are more important than the software used for processing later. It's easier for me to make a take of a frame, with changed settings, than to sit and move the sliders in the converter afterwards ”
for the rest there is Hugin, Lightroom.
Arkady, thanks for your articles, good luck! As for the converter program, I have been using acdsee for more than 5 years. I rent jpeg + nef. Tried adobe ps, capture nx. For my amateur purposes better acdsee not.
Arkady, thank you for the articles and reviews, he learned a lot of useful things for himself. As for the converter, I fully agree with you - the best result is a native converter. Enumerated and tested by me personally converters - Aperture, Lightroom, Capture One, DxO, RawTherapee, Silkypix, Bibble. View NX, scolded by many here, showed the best result! The color is exactly what I saw! The same is true for k Capture NX.
Often I use it to process events I’ve shot, I drive the entire set completely. Almost all the necessary tools are available. Well, if something is missing, welcome to Capture NX! To do this, you only need to press Win + O or Cmd + O, depending on the operating system and tools, there is already a car and a small cart (which can be supplemented with plug-ins). One U-Point is worth it!
Now about what they do not like:
- no ability to suppress noise (View NX)
- there is no way to create a preset (it infuriates to pull the sliders for each photo) (View NX)
- no flexible adjustment of sharpness (View NX)
- there is not enough flexible settings for the BB (View NX) (subgroups in the specified presets as in Capture NX)
- slowed down display after any change - this concerns sharpness, at first it seems very sharp, and after 5-10 seconds it gets blurry a little (demosaic works) (View NX + Capture NX)
- interface (Capture NX)
- in Capture NX, additional changes are deactivated from the New step tab to the basic ones (if for some reason you need to go back) this is most annoying, I even forgive him the interface - you need to make a change in the database, then poke into the last additional one to see what you did it, well, if you didn't like it, welcome back ... to the poke method)))) !!!!!!!!!!
And the biggest minus - after leveling the horizon, the previously sharp photo becomes soap (the degree depends on the source) (Capture NX + View NX)
As for the rest, I like Aperture and Lightroom. Aperture for the interface, presets and the recently appeared BB for Skin Tone is not a bad thing, but the exposure and brightness engines somehow do not work correctly. Lightroom has an amazing work with masks, but it is impossible to make the color even closely similar to ... .. as from a native converter)))))
I tried RPP. Under the virtual machine. It is very, very, thought about installing Hakintosh. Actually, there is a FS for it, too, Chrome, but at home I do not work with anything else. :)
A fundamentally different processing method, much less parameters. It's like moving to a completely different coordinate system, with its own advantages and disadvantages. And the workflow is changing, before I needed neutral pictures with a maximum of detail, and everything else I “twisted” my hands. And now the output is, in fact, a finished picture. This is if we are talking purely about the photo. So now the Jpegs rule in the FS, and the Ravs appear in the RPP.
And the biggest minus sign - after leveling the horizon, previously a sharp photo becomes soap (the degree depends on the source) (Capture NX + View NX)
I think I will not reveal the big secret that when processing both jpegs and Po in native Nikon programs, sharpening should be done at the very last stage. And alignment of the horizon in general can greatly spoil the image due to the displacement of the pixel orientation. Not for nothing that some cameras have a built-in level, but on Ibei you can add a water level with a connector for a flash shoe for a penny. In short, the obstruction of the horizon is not such a harmless thing. Crop competently and thoughtfully until it becomes a habit.
I just made an experiment to develop a complex NEF in terms of a greenish tint skin. Only conversion to jpeg. Surprised by the result.
View NX green highlighted.
Capture One led to purple.
Lightroom is the most natural skin tone.
I repeat, only conversion.
In Lightroom, the profile was from the camera or Adobe Standard?
default is Adobe Standard