Exposure is the amount of light needed to create a photograph. Nothing complicated.

Exposition. Exposure compensation
The exposure is dosed by fixed assets:
- Shutter speed
- Aperture
- ISO sensitivity value
- Flash (or other lighting fixtures)
Basically, in digital photography it is customary to say that exposure depends only on excerpts, aperture, and ISO, but in fact everyone who says so omits the flash.
Exposure is measured in units of exposure EV (Exposure Value).
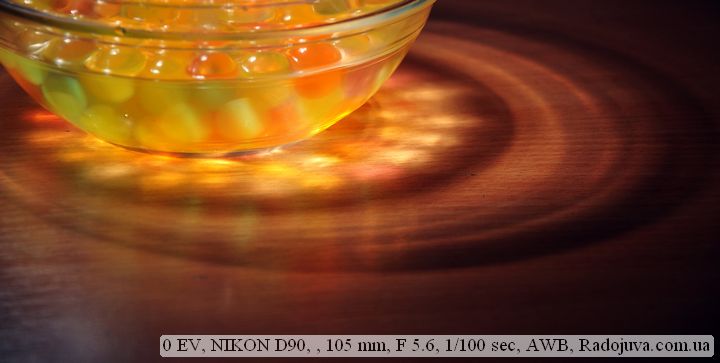
Image exposure unchanged + -0
Important: if you fix the ISO value and flash power (as, for example, on old film cameras), it will remain possible to change only the shutter speed of the camera and the aperture of the lens. In this case, shutter speed and aperture are called expocouple. They are a couple, because when one changes, the other adapts to the second. This adjustment is just carried out by the camera.
The most important: changing one of the parameters of the main four, you need to change one of the other three to save the current exposure. So, changing the shutter speed, you will need to either change the aperture value or the ISO value to save the current exposure value.
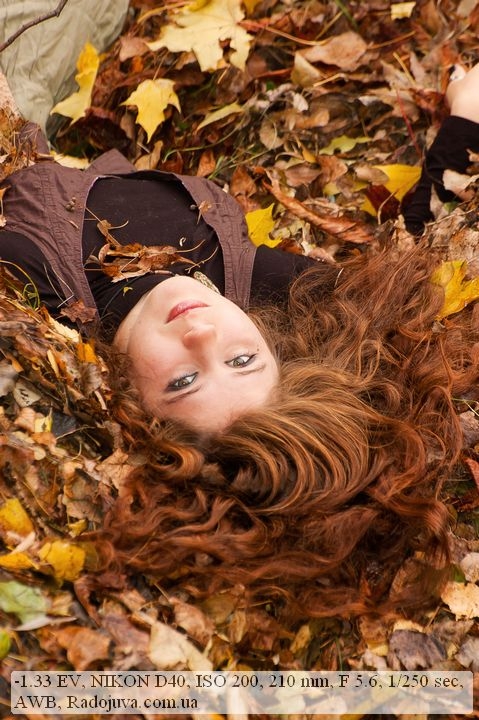
The exposure is shifted 1.33 steps to the left, since the picture has a lot of dark areas
The exposure meter is responsible for correct exposure in the camera. The light meter is a special sensor in the camera that measures the amount of light “absorbed” by the lens and calculates the “correct” parameters excerpts, aperture, and ISO, and sometimes flash output to create the “correct” exposure.
Correct exposure usually means filling the image with light and dark in a balanced way, usually the meter tries to make the “correct” histogram. In general, how an exposure meter does this is very difficult to explain on the fingers.
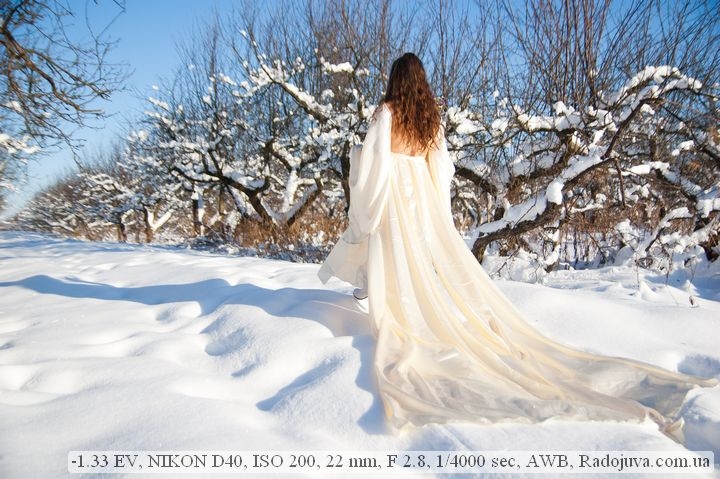
The exposure is shifted 1.33 steps to the left, although, according to the idea, it was necessary to shift to the right. This is the specifics of the camera itself.
Auto Exposure Metering
In automatic modes, in virtually all modes except P, A, S, M, the camera completely determines the parameters excerpts, aperture and ISO. If the flash is on, the flash output is also calculated. Depending on the shooting mode, the priorities of one or another parameter in the exposure are calculated.
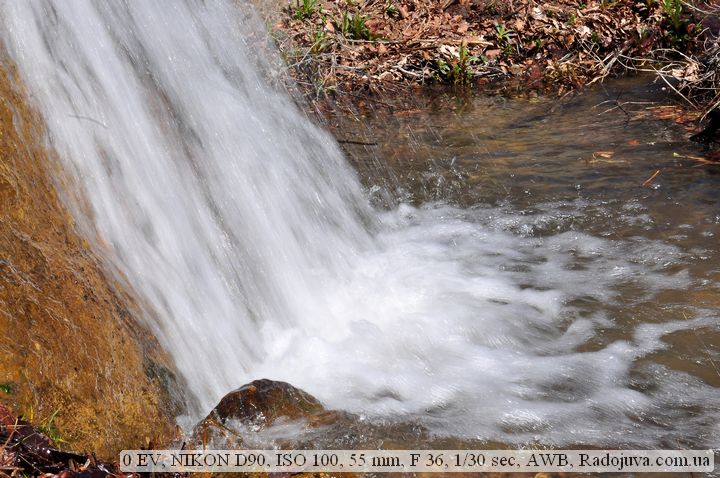
no exposure compensation
Exposure compensation
Usually the camera (camera) has the ability to shift the overall exposure of the picture to the left or right along the histogram (either add the amount of light, or reduce the amount of light). A special button is responsible for this, which is very easy to find, it has the designation “+ -“. For example, on Nikon cameras, the “+ -” correction can only be used in creative modes P, A, S, M, in all other modes, the correction will not be available.
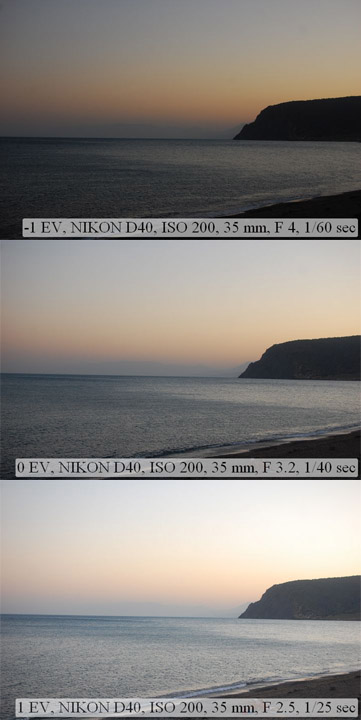
Exposure compensation. You can clearly see what has changed. -1, 0, +1
Exposure Compensation with the Flash Off and the Auto ISO Off:
1. In A (Aperture Priority) mode - when using “+ -”, the camera will vary the shutter speed to compensate for the exposure
2. In S mode (priority excerpts) - when "+ -" is used, the camera will change the aperture to compensate for the exposure
3. In M mode (manual mode) - the camera will not respond to “+ -” correction if the AUTO ISO function is off. If AUTO ISO is on, the camera will change the ISO value.
4. In P mode (program mode) - the camera can change both shutter speed and aperture
If the flash is on, then the compensation occurs with a change in the flash output and other parameters. Especially when the flash is on (in TTL auto flash output mode), the “+ -” compensation is strongly felt in manual mode M.
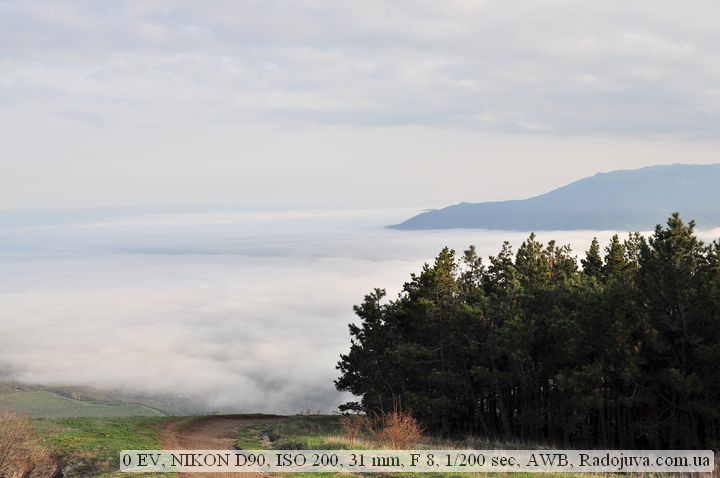
The camera’s exposure meter does a good job with some tasks. And the amendment does not need to be used
Flash Compensation
Another complication when dealing with “+ -” is the separate flash level compensation function. This function has the same icon as “+ -“, but also adds a lightning bolt. This function directly affects flash level compensation. Changes in the same way, by a certain amount of EV It is very difficult to calculate flash level and exposure compensation at the same time. For example, if normal exposure compensation is turned on “+ -” at + 0.3EV and “Lightning + -” at + 0.7EV, then the overall exposure will have an offset of + 1EV.
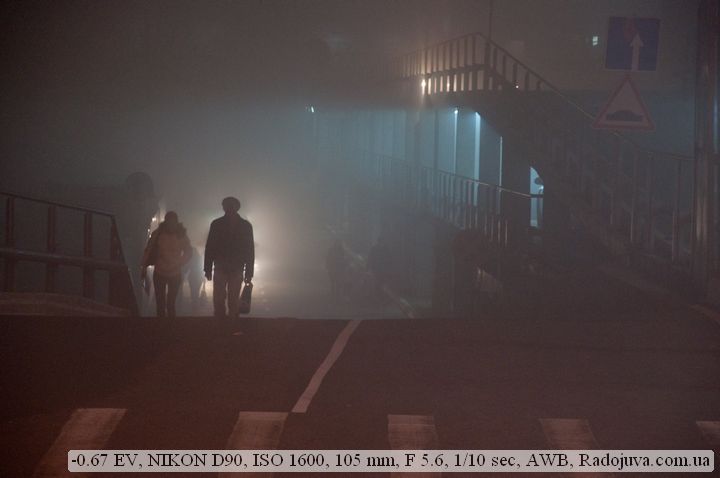
Shooting in difficult fog conditions requires exposure compensation
Even worse, the flash output when using external flashes changes in two places - on the camera and on the flash itself. The camera can have a flash output correction of + 1E.V., And on the very external flash there may be a power correction of -0.7EV in the end, the photo will receive + 0.3EV general exposure corrections from the standard that the camera's automation will offer.
And if you wind all three values of exposure compensation: flashes in the camera menu, external flash and total exposure, the damn leg will break down to calculate the final result.
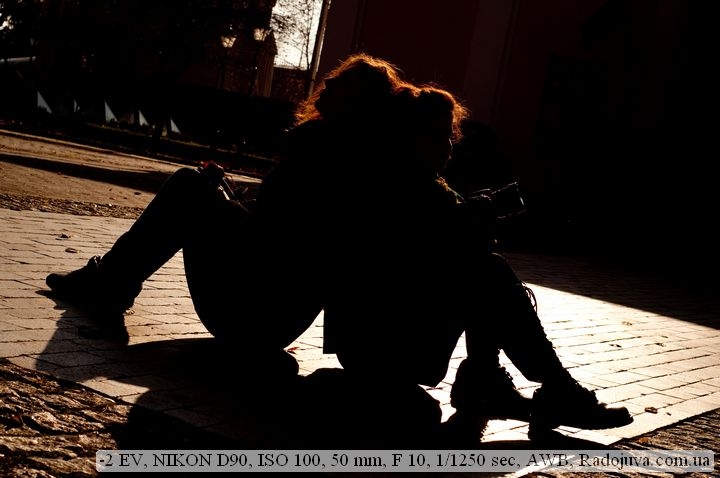
Strong exposure compensation to the left (towards the shadows) to give the image the desired silhouette effect.
Why exposure compensation is needed
Correction is needed to create the necessary exposure for the photographer. The camera is always trying to do something in between, which is not at all suitable for creating the desired effect on the photo. Therefore, the photographer makes an amendment and gets either a slightly lighter shot, or a little dark.
Isn't it more convenient to use manual mode instead of exposure compensation?
No, it is not more convenient when active shooting is in progress, it is best to work in the semiautomatic device P, A, S and make corrections, rather than taking pictures at random. As my experience shows, the fully manual mode is only good for unhurried scenes, photo experiments, studio shooting. If you shoot in a semi-automatic P, A, S, then usually the camera makes a more or less normal exposure, which is easy to hold out by shooting in RAW.
Why is exposure compensation necessary in manual mode M?
- When the flash is on, modern cameras still measure the exposure and, using the flash power, try to make the “correct picture”, taking into account the correction from the measured norm. The correction only works if the scene is underexposed according to the camera.
- With auto ISO turned on, modern cameras also still take exposure metering and try to take the “correct shot” by adjusting the ISO, taking into account the correction from the measured rate.
- In the viewfinder, it is convenient to watch exposure deviations with the indicated correction from the norm that the camera shows.
- When switching to another mode, for example P, A, S the correction “+ -” starts working, sometimes it is very convenient.
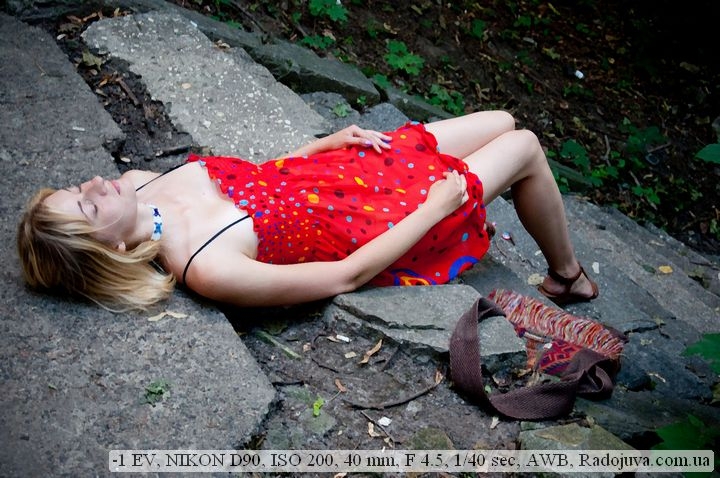
Strong exposure adjustment to the left in order to save the skin texture from overexposure, frequent reception when shooting people
When should exposure compensation be used?
In fact, it is the photographer who decides when and why he needs to perform exposure compensation. There are general recommendations:
- Increase compensation when shooting white on white
- Zoom out when shooting black on black (black cat on a black background)
- The usual exposure compensation when the camera's metering "lies".
But, each modern digital-SLR camera has its own metering, which measures according to its own criteria. You need to get used to your own camera, to know exactly in which scenes the camera will “overexpose” or “under-light”. Here's an actual example: my simple camera Nikon D80 It has a poor property of shifting the exposure to light tones, thereby making the scene overexposed.
Personal experience
I often use exposure compensation. Basically, no more than + -2 ev. All modern CZKs have this function, and it is very convenient and practical. I don’t give advice on setting the exposure, as everyone must decide how to emphasize the atmosphere in the photo with the help of the exposure.
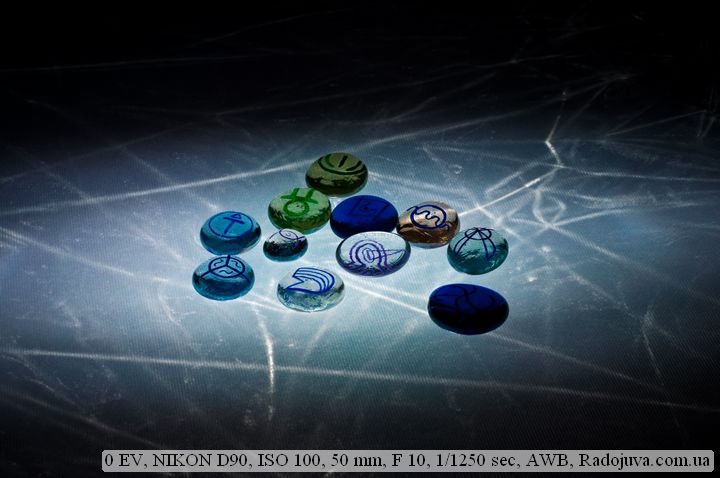
Sometimes with a flash, the camera normally works on exposure
Nothing is clear and complicated
If you don’t know how, it’s better to adjust the exposure, try using bracketing escorts. Even easier, shoot in RAW and adjust the exposure with a RAW converter such as Adobe Camera Raw, Adobe Lightroom, and native camera software. From RAW, you can indulge in an exposure compensation of + -2 EV with virtually no loss of quality
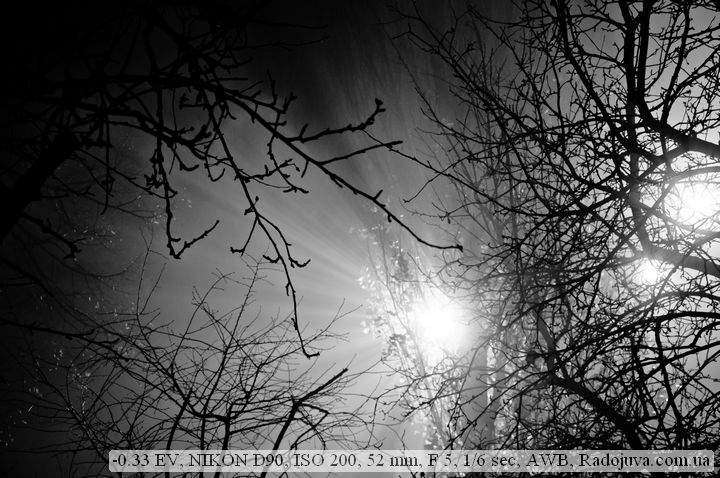
Exposure-corrected flashlight light
Conclusion:
Exposure compensation helps you achieve the desired effect in photography and simply correct the automatic exposure metering in the camera. Exposure compensation is a creative element that always needs to be individually adjusted with each shot. If you have questions about exposure compensation, ask in the comments, as the topic is quite complex. I advise you to familiarize yourself with a related topic - metering methods.
Help to the project. Thanks for attention. Arkady Shapoval.


I apologize if I say something stupid ... :) Nothing is mentioned in the article about the method of exposure metering. Or does it have little impact?
https://radojuva.com.ua/2012/12/exposure-methodnikon/
That’s why I’m so able to protect myself when exposing yourself to rotten exposition +1 chi +3 and don’t lose the image and the image I’ve taken photos ??? Dyakuyu for vidpovid !!!
What exactly do you mean by quality?
I’m throwing on a respectable photo, if it’s not darker, without great noise !!!
Good evening, Arkady!
Please tell me, do you use or had experience with a gray card to measure exposure and white balance?
If so, which is better and where to get it?
Thank you!
Yesterday I purchased the D90 (Thailand) as an addition to the D7000 (Thailand), the exposure compensation was set as a constant value: -1.7. The D7000 did not initially make any amendments. That's what different models of the same company mean.
And why did you immediately put an amendment that you checked everything and understood everything in one day? What does the D90 give too light shots? Personally, I only use corrections in my D90 when I see on the monitor that the picture is not working and if the hologram agrees with me. And I noticed that I often put it in + 0,3- +0.7 I don't like dark pictures ...
Excellent article!
In the photo with pebbles in the caption there is a mistake "with a flash"
And I always, where the situation allows, use live view to get a normally exposed frame (D3100 camera). Photos are more transparent or obtained in comparison with photos obtained by measuring exposure through a mirror. This is probably one of the disadvantages of this camera.
http://camerasim.com/camera-simulator/
Here you can clearly see how aperture, shutter speed, and ISO affect exposure.
Good afternoon. The girl on the stairs is not in balanovo by chance in the Crimea?
Good day, Arkady. Thank you very much for the article, a lot has been clarified.
I use the camera for only a couple of weeks and I have such a question, in P mode on Nikon d 7000 my shutter speed and aperture settings do not change at all, in all other modes, when I turn the control wheel, the values change, please tell me what's the matter ??
The article is good, informative. THANKS!
But as always there is one BUT! The article does not contain a description of the effect of the amendment, that is, how to make it playing as an expopair.
From myself I will add the missing, taken from WIKI:
”The amount of exposure compensation is also specified in these units. An exposure shift of 1 EV means that the amount of light hitting the photographic material is changed by 2 times. For example, if the camera calculated shooting parameters are 1/50 sec (shutter speed) and f / 8 (aperture), then exposure compensation +1 EV will result in shooting at 1/25 sec and f / 8 in aperture priority mode or 1/50 sec. and f / 5,6 in shutter priority mode.
Usually the photographer chooses the exposure compensation based on his experience, but there are general guidelines: shooting light objects or a dark object against a light background - + ½ ... + 1 EV, very light - + 1 ... + 2 EV, shooting dark objects or a light object against a dark background background - -½… -1 EV. In some cases, setting the exposure compensation can lead to too much overexposure of highlights or underexposure of the shadows of the picture, which must be taken into account when choosing its value. In addition, the photographer's special attention is required, who must remember the set exposure compensation in order to turn it off when shooting standard scenes. "
http://ru.wikipedia.org/wiki/%D0%AD%D0%BA%D1%81%D0%BF%D0%BE%D0%BA%D0%BE%D1%80%D1%80%D0%B5%D0%BA%D1%86%D0%B8%D1%8F
This block is vital to me, since I am mastering Zenith ET + Helios 44-2. I am not interested in the number yet.
Is there still a film where they process it?
Hello. Please tell me if I photograph in the shade or in poor lighting, the exposure correction should be put in the direction of plus or minus. I'm a newbie. Thanks!
the amendment does not always need to be set, shoot in equal format and then select clearly on the camera ..
hello my nikon5100 fotkal everything was cool but I started shooting in lv mode but took it off and then switched to shooting mode and now he stopped giving me pictures, that is, there’s a snap photo but the photo itself turns black, that’s nothing on the screen that could be tell me please so miserable
Goodnight. I shot the night city from the bridge, there are a lot of lights near the bridge railing, they shone in the lens, as a result, white spots, glare and a couple of hot pixels appeared on the picture. He covered the lens with his hand from the light, it did not help. Tell me how to get rid of such defects?
close the aperture to 8-11, use a hood, change the shooting point ... use a different lens, with a different coating .. in general, experiment ...
These are not defects, but a lack of experience of the photographer. What you see in the viewfinder is seen by the sensor of the camera, but the human eye is much more perfect. Do not let light difficulties enter the lens, move the lens to the side, compose the frame slowly. Shooting against the light is the most difficult. To begin with, everything is around the world, around the world, around the world ...
It is VERY DIFFICULT to calculate both flash compensation and exposure. For example, if the normal exposure compensation “+ -” with a value of + 0.3EV and “lightning + -” with a value of + 0.7EV is turned on, then the total exposure will have a shift of + 1EV.
Probably you mean VERY EASY?
“3. In M (manual) mode - the camera will not respond to “+ -” correction if the AUTO ISO function is off. If AUTO ISO is on, the camera will change the ISO value. ”
The question arose: if in the M mode, with the AUTO ISO function turned off, set the minimum value of ISO 100, set the correction “-“, how will the camera behave? (in my case, D5100) After all, there is nowhere to lower it ...
The amendment will not be taken into account. The amendment will start to work when you switch the camera to any other mode, either turn on the auto, or attach the flash.
hello my nikon5100 fotkal everything was cool but I started shooting in lv mode but took it off and then switched to shooting mode and now he stopped giving me pictures, that is, there’s a snap photo but the photo itself turns black, that’s nothing on the screen that could be tell me please so miserable
I noticed that on the Nikon D3100 camera the correction -0,3EV is almost always universal.
If you put in plus the quality of the picture drops significantly. IMHO despite the fact that I shoot mostly equipment.
hello my nikon5100 fotkal everything was cool but I started shooting in lv mode but took it off and then switched to shooting mode and now he stopped giving me pictures, that is, there’s a snap photo but the photo itself turns black, that’s nothing on the screen that could be tell me please so sorry
Did you decide to “gore” everyone here?))
Good afternoon.
The first photo example in the article says:
"The exposure is shifted 1.33 stops to the left because there are many dark areas in the picture."
Didn't understand why to the left, to the minus? I'm a beginner, but there seems to be a mistake here and there should be "right" and "plus". After all, we want to illuminate these dark areas in the photo.
To the left, because if you didn’t make the correction, the camera would have made the exposure higher and the dark parts of the image would have failed (she would have simply tried to average everything). To keep dark areas and a darker tone of the photo.
Arkady, what can you say about the Fuji X-A1 camera, for some reason, it contains an exposure of only 1/30. I have not seen such a thing in any camera, if we turn on the built-in flash, we get 1/60, this is the priority of the Aperture.
Thanks for the good article. On my Nikon D80, too, overexposure - I had to put a constant correction minus 0,3.
Arkady put a Helios 3100m44 lens on his Nikon D7, took pictures with an exposure of 0, then -5, and +5. in M mode naturally, but the photos are identical !!!! Q. Does exposure compensation not work with a non-native lens? What I wanted to achieve: reduce the exposure to the maximum in order to increase shutter speed and get a picture with deeper colors, because the matrix will remember colors longer. I’m certainly a noob in photography, but just experimented!
The article states:
no, I set it to 100, okay, I'll try it again tomorrow afternoon, but with a native lens!
As I understand it, in 80% of cases matrix metering does an excellent job. Center-weighted can be used with a classic portrait, when the face occupies most of the frame. In which cases to apply the point? - when we say a disco or a concert, the light flickers. Or say if shooting against the sun. Or are there more nuances? I would like to hear in more detail what measurement for which cases.
Hello everybody! I propose here such a technique, who are interested:
Selection of the Interpolated Exposure of the Maximum Dynamic Black and White Range (hereinafter, I.E.M.D.S.D.)
ATTENTION!!!
This technique is not recommended for reportage shooting due to the increased preparation time for shooting !!!
This technique is a simplified version of the methodology of the mathematical calculation algorithm I.E.M.D.S.D., which is much easier and faster in practical application than the mathematical version, but which, unfortunately, is a little less accurate. The lower accuracy lies in the fact that in this simplified version, when obtaining the measured intermediate interstage value I.E.M.D.S.D. it is not visible to which of the two borderline (between which there was an intermediate measured value of I.E.M.D.S.D.) hardware (which can be selected on the camera) values is it closer, which ultimately requires the shooter to take an intuitive solution - which of the two shutter speed limits to choose? Nevertheless, even if the shooter intuitively mistakenly chooses a more distant value interpolated, then he will still be mistaken by no more than one stop (one shutter speed step), which is not actually critical, since this will not result in a catastrophic loss in highlights, and that, in the end, it is easy to get better later in the photo editor. There is also another option for working with the intermediate value of I.E.M.D.S.D. - limit values can be included in the "exposure", and later choose the image you like the most (but at the same time, remember about the double wear of the camera mechanics!).
Let me remind you that this technique is necessary exclusively for working in a purely manual mode (the choice of aperture and shutter speed is manual!)) And for people who have recently begun to master working with a camera (equipped with a built-in exposure meter capable of working in the spot meter mode - "spot" measuring the illumination of the subject by the reflected light from the subject) in the “manual” mode of exposure selection, since people who have been working in the “manual” mode of exposure selection for a long time, without using any hardware or calculation means, determine the exposure pair intuitively with sufficient accuracy.
PROCEDURE:
1 - Select a fully manual exposure mode on the camera (manual aperture and shutter speed selection);
2 - Select the required aperture value, depending on the artistic nature of the shooting;
3 - Select the “spotmeter” mode on the camera (“spot” metering of the illumination of the subject by the reflected light from the subject);
4 - Select the most shaded point on the subject in the shot in the viewfinder and direct the spot metering area to it;
5 - Turn the shutter speed dial to set the exposure meter value to “0” (so that the exposure meter scale does not go into plus or minus);
6 - Select the most illuminated point on the subject of shooting in the shot shot according to the viewfinder and point the spot metering area at it;
7 - By rotating the shutter speed dial, and, most importantly, counting the number of switched steps (shutter speed positions), set the exposure meter value to “0” (so that the exposure meter scale does not go into plus or minus) - the resulting number is “X” of all switched steps (shutter positions) will be the full contrasting cut-off dynamic range of the captured image;
8 - If the number "X" is even, then rotating the exposure selection dial in the original direction (in the opposite direction to the originally measured shaded point of the captured image) count exactly half of all counted steps from the obtained number "X" of all switched steps (shutter speed positions) - that is, divide the number "X" in half;
9 - If the number "X" is not even, then the true value of I.E.M.D.S.D. will lie between the value ((“X” / 2) + 0,5 [value of one step]) and value ((“X” / 2) - 0,5 [value of one step]) - that is, it turns out intermediate, and the values ((“X” / 2) + 0,5) and ((“X” / 2) - 0,5) are the hardware values of the exposure values available for setting, and they will be borderline neighboring values for the intermediate I.E. .M.D.S.D., And here it is, the shooter will have to choose which one of them intuitively, or include them in the "exposure". The choice is made in the same way - rotating the exposure selection dial in the original direction (in the opposite direction to the initially measured shaded point of the captured image) count exactly half the steps from the obtained number “X” of the switched steps (shutter positions) with the addition or subtraction of 0.5 one whole stop;
Where to start the selection of I.E.M.D.S.D. - from the measurement of the lightest point of the subject or from the most shaded point - it does not make a fundamental difference!
Good luck to everyone on the set, Yuri!
Great!
Not a bad way.
Just if the landscape does not have a very dark place or is it (they) so small that even spot metering will not find them? For example, a summer sunny day from 11:00 to 14:00, when it often turns out to go on an excursion, i.e. to arrive at a given place.
There remains only the solar rule of 16, probably.
Thank you sincerely for the feedback Serge P.! Yes, I agree, it may turn out that under (for example, in my D200, the spot metering zone on the focusing screen is 3 mm), the spot metering zone will not be able to find the maximum shadow point, but I haven’t come across this yet - so far I was lucky. And, nevertheless, just in case, please tell me where you can find information about the “Solar rule of 16”? Thanks in advance!
Dear friends, attention !!! A small addition - it is recommended to make both spot metering (the most illuminated part of the scene and the most shaded part of the scene) so that the difference in distance from the camera of both surfaces reflecting light into the exposure meter (measuring the light reflected into the camera lens from which it is performed) is as much as possible less. With an increase in the difference in the distances from the camera of the measured points of the scene, the interpolation error increases, respectively - that is, for example, if the most illuminated point of the scene is further measured, then the interpolation will receive an error towards the lights (overexposure), and if further there is shaded point of the scene, then interpolation will receive an error towards the shadows (underexposure).
Attention!!! Dear colleagues, when choosing measurement points, I recommend not to forget that surfaces with different colored surfaces have different reflective and absorbing capacities - it is necessary to choose surfaces that are as close as possible to each other in color in order to reduce the measurement error!
Here (http://www.facebook.com/Yurimgn/photos_albums?lst=100007624545985%3A100007624545985%3A1439209820), on my facebook page, there are examples of photos taken using this technique. All photos in my albums were taken exclusively using this technique, in all modes completely manual (White balance-manual selection, aperture-manual selection, shutter speed-manual selection, sensor sensitivity-manual selection, image optimization-manual selection, focusing or focusing is manual), and not a single photograph (except for the photograph of the Bell flower, which had to be corrected for brightness by -20% - the native Nikkor often failed in metering the exposure, unlike the non-native Voigtlander, which never failed!) was not corrected or edited, since the need for color correction, exposure, contrast was completely absent - all photographs conveyed extremely accurately, and the color, and the cut-off picture, and the contrast picture, that is, exactly the same as they were on the scenes during shooting!
I would also like to note one pleasant factor of completely manual work - everyone knows the "gluttony" of the Nikon D200. I always carry two spare batteries with me, in addition to what is already in the camera - a total of 3 batteries. Even when I was buying the camera, I read a lot of complaints from people about the fast discharge of the Nikon D200 battery, and therefore I immediately bought two spare batteries, and, as it turned out later, in vain - one would be enough! I immediately assembled the camera for manual work - I installed a KatzEye Optics focused screen, bought a Voigtlander 40mm f / 2 Ultron SL-II N Aspherical (I really liked the color rendering). I was also presented with a kit 18-55 Nikkor with an inoperative focusing motor. With such a meager set, I shoot for myself. So, during manual work, as it turned out, the camera battery is almost infinite - I recently came on vacation with a battery, the charge level of which, on the charge indicator of the upper display, was at the last division. And I shot about 150 frames on this last division (these are all pictures taken on vacation), and even in NEF, the recording of which is already quite energy-intensive! So, here's another huge plus of the manual mode of working with the camera)) ...
Good day! Great articles. Thanks for the great work.
I have a question:
Once the average picture can be extended by exposure in the editor from -2 to +2 (ideally). It turns out quite realistically to make an HDR photo from one RAW image? those. use one picture with different edits: -2,0, + 2 and then collect HDR based on them. Or I don’t understand something.
Possible.
Although, I think, it's easier and rather just to work separately with the sliders of lights and shadows.
I wish everyone hello! I have this question for advanced amateurs and pros. I have a D5200 carcass and Samyang 14mmf / 2.8 and Nikon 28mmf / 1.8 lenses. One of the sites has a lot of sample photos and all with exposure data (You, Arkady , also all the photos are the same and even with the names of cameras and lenses. Thank you). I live in a big city. Stars can be seen, at best, Ursa Major and Sirius. I will soon be in the countryside, and there the Milky Way lies directly on shoulders. I want to take a little (or a lot). Mostly the sky photos on sites are on FX cameras, I have DX. Is it possible to shoot the night sky on my lenses well using the exposure data from the FX carcasses, what corrections should be made in shutter speed, aperture and ISO and what parameters should be paid attention to first and are there any differences when shooting on similar glasses on FX and DX carcasses? Sorry to ask, but where I go there is no computer and I can’t even view the pictures on the big screen until I return, not to mention editing. I don’t want to carry the knowingly dregs. If you help, I I will know what parameters to pay special attention to I will give a couple of examples from the site: D610 carcass. 28mm lens, ISO-1600, f-2,2, t-30sek. And another: Tokina 11-16, f / 2.8, ISO-3200, t-20sek. If anyone will cut into my rubbish and help with advice, I will be very grateful to that. Thanks
An addition to the above method for adjusting the exposure in manual mode “M” for shooting at a small relative aperture (with a fixed aperture).
There is a need to shoot a scene with a very strong lack of lighting (for example, the night landscape of the city), but at the same time, with a large depth of field. Naturally, a large depth of field requires a very small relative aperture, that is, in simple terms, it requires a strong clamping of the diaphragm. Here, shooting using the above method, when measuring with the built-in exposure meter (in spotmeter mode - spot metering) the darkest part of the scene (which would be further interpolated, through it and by measuring the lightest part of the scene, the true average shutter speed) may run into the problem of setting the maximum permissible exposure time (for example, on D200 it is 30 seconds), which, of course, will not allow us to determine the maximum exposure value (for example, on my D200 I will not see the maximum exposure value for omnogo stage portion, if it is at the exposure meter to be more than 30 sec.). In this situation, we have to resort to a little trick. As you know, the magnitude of the change in the relative aperture and the magnitude of the change in exposure are related by an inverse quadratic dependence - what does this mean? This means that if we change in some direction the relative aperture (aperture), in some sort of value A, then we change the shutter speed to this value in the square (A * A), in the opposite direction. Example:
- We increase the relative aperture (aperture) from 4 to 2 (the larger the aperture value, the smaller the diameter of the hole through which the light passes, and the less light passes through the lens - therefore we must remember that increasing the aperture value, we decrease the amount of light, passing through this lens, which means that we must increase the shutter speed, and vice versa ...), that is, we increased the diameter of the relative aperture by 2 times, which means that the shutter speed must be reduced by 2, squared, times or 2 * 2 = 4 (times). If, according to the exposure meter, for aperture 4, the shutter speed was 8 (sec), then for aperture 2 we set the shutter speed 8 (sec) / 4 = 2 (sec). Conversely, we reduce the relative aperture (aperture) from 2 to 8, that is, we reduced the diameter of the relative aperture by 4 times, which means that the shutter speed must be increased by 4 * 4 = 16 (times). If according to the exposure meter, for aperture 2, we had a shutter speed of 3 (sec), then for aperture 8 we set a shutter speed of 3 (sec) * 16 = 48 (sec) (perhaps, working out such a shutter speed, already in the “bulb” mode).
In general, nothing complicated ... So, we will use this property of the lens. Suppose we need to shoot a scene of a night city with an aperture of 16, but when measuring the darkest part of the scene using an exposure meter, we (do not forget that the metering mode should be point-like) cannot see the maximum shutter speed value, since we twisted the shutter-wheel already before “bulb” mode (independent countdown of the shutter opening time by the stopwatch), and with us the exposure meter still shows an underexposure. Knowing the quadratic dependence of the aperture and shutter speed, when measuring the darkest part of the scene using the exposure meter, first ignoring the exposure meter, we set the maximum shutter speed (for example, I have 200 seconds on the D30). Then, taking into account the readings of the exposure meter, we begin, already with the aperture wheel, to set the correct aperture value for shutter speed of 30 (sec). Suppose we had this aperture value of 8. Then everything, as in the method described above, but already for aperture 8 - measure the lightest part of the scene by rotating the shutter speed wheel (for example, we have 1/3 sec.), Counting the number switched stops (steps) (for example, we have 20 stops), and unscrew, again, in the opposite direction (towards the value of measuring the darkest part of the scene), half of all stops (steps), between the results of measuring the darkest and brightest sections scenes (for example, we have 10 stops), and we get true Noah averaged shutter speed to aperture 8 (say, we do it will be 3 sec.). Now, knowing the quadratic dependence of the aperture and shutter speed, it is not difficult to calculate the true average shutter speed for the desired aperture 16. If we reduce the relative aperture (aperture) from 8 to 16, that is, by 16/8 = 2 (times), then, therefore , we must increase the exposure time by 2 * 2 = 4 (times). Now we multiply the true average shutter speed 3 (sec) for aperture 8, 4 times, and get the true average shutter speed 3 * 4 = 12 (sec) for aperture 16 (I have D200, the shutter speed is 12 sec., But I always choose from the intermediate value the closest value from the side of underexposure - but, this is exclusively my principle, it is possible in the direction of overexposure). We set the closest possible (that is, the closest value accessible by the technical capabilities of the camera) value - for example, I select 13 (sec) and take a picture. We get the most accurate picture of the illumination of the scene. So, often knowing the technical features of the equipment, one can far surpass the camera automation in difficult shooting conditions, where the camera automation is guaranteed to fail ...
I wonder if it is possible to shoot a landscape with a large depth of field using the 'stack' method?
(i.e. at an open aperture with subsequent 'stitching' of several frames)
Hello)). Do you ask in the context of my methodology? If so, can the task be more specifically voiced?))